1. URLをブラウザで開く…
黒い画面が登場する。
https://huggingface.co/settings/tokens
2.Setup をバンバン押していく!
途中で、Googleやメモリーがとか聞かれますが、シカトしてください。

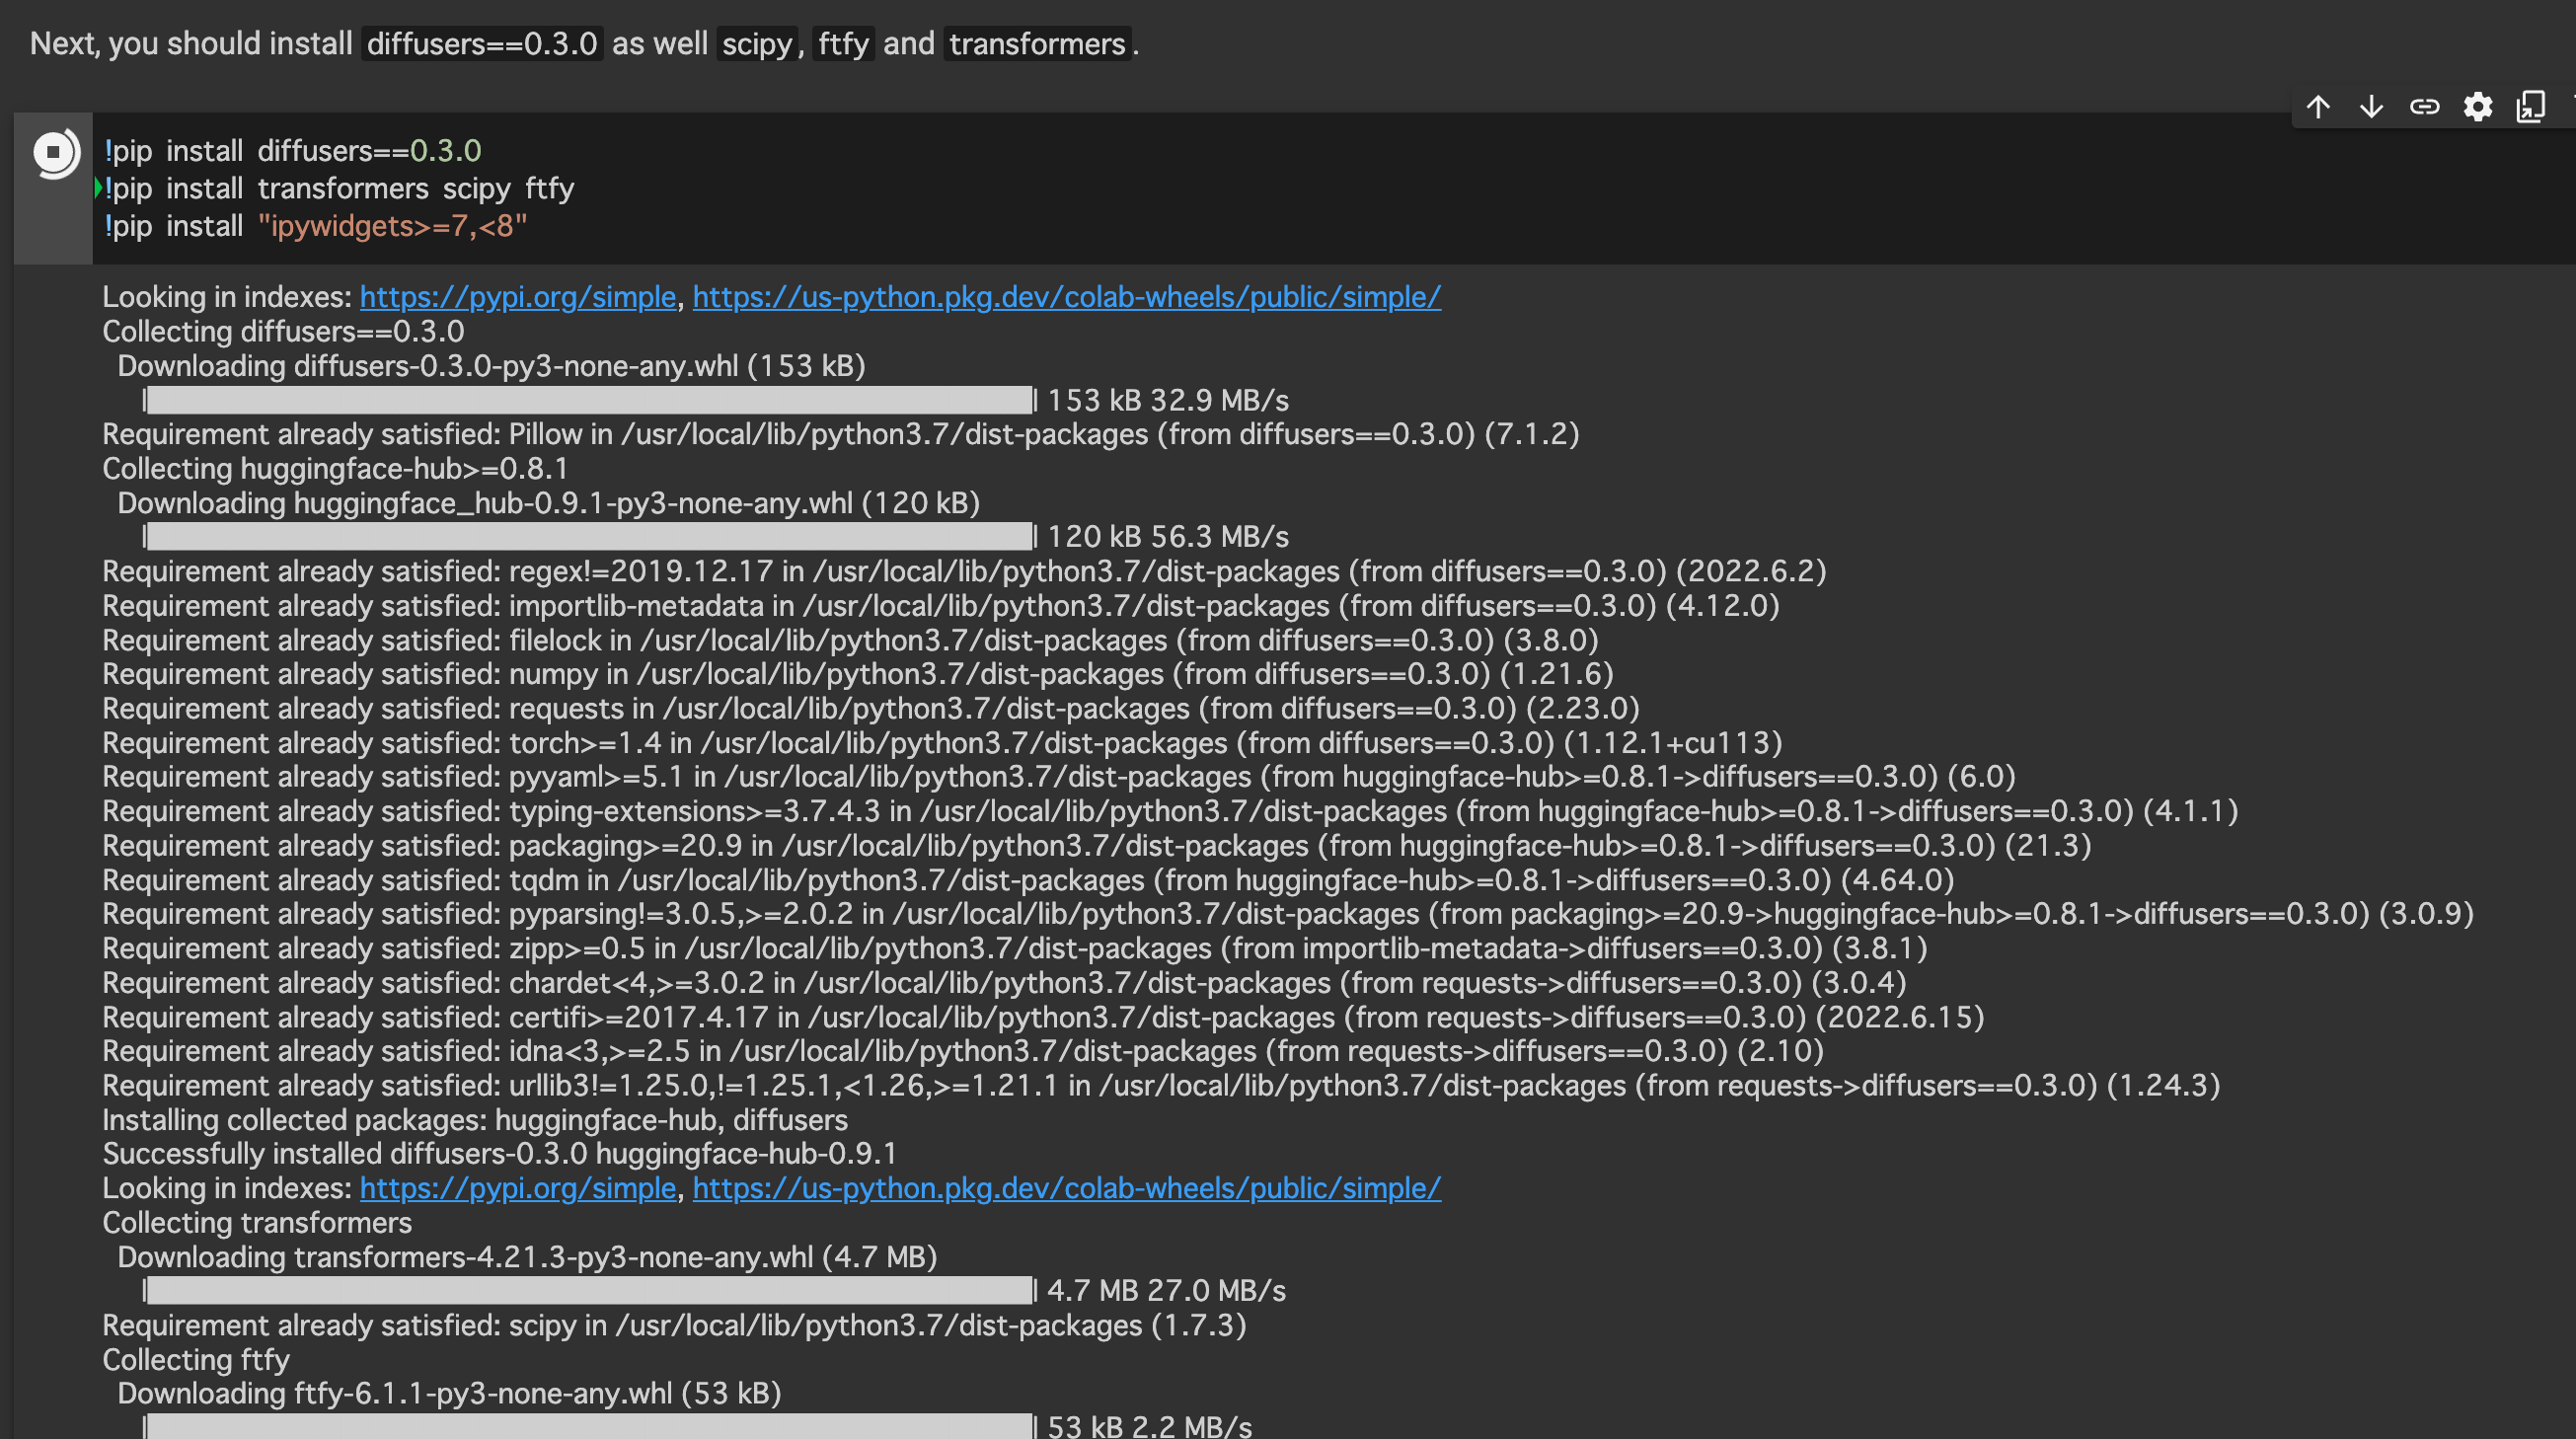
3.とりあえず、ひたすら再生ボタンを押していく!
なにかわかりませんが、一生懸命、なにかをしています笑
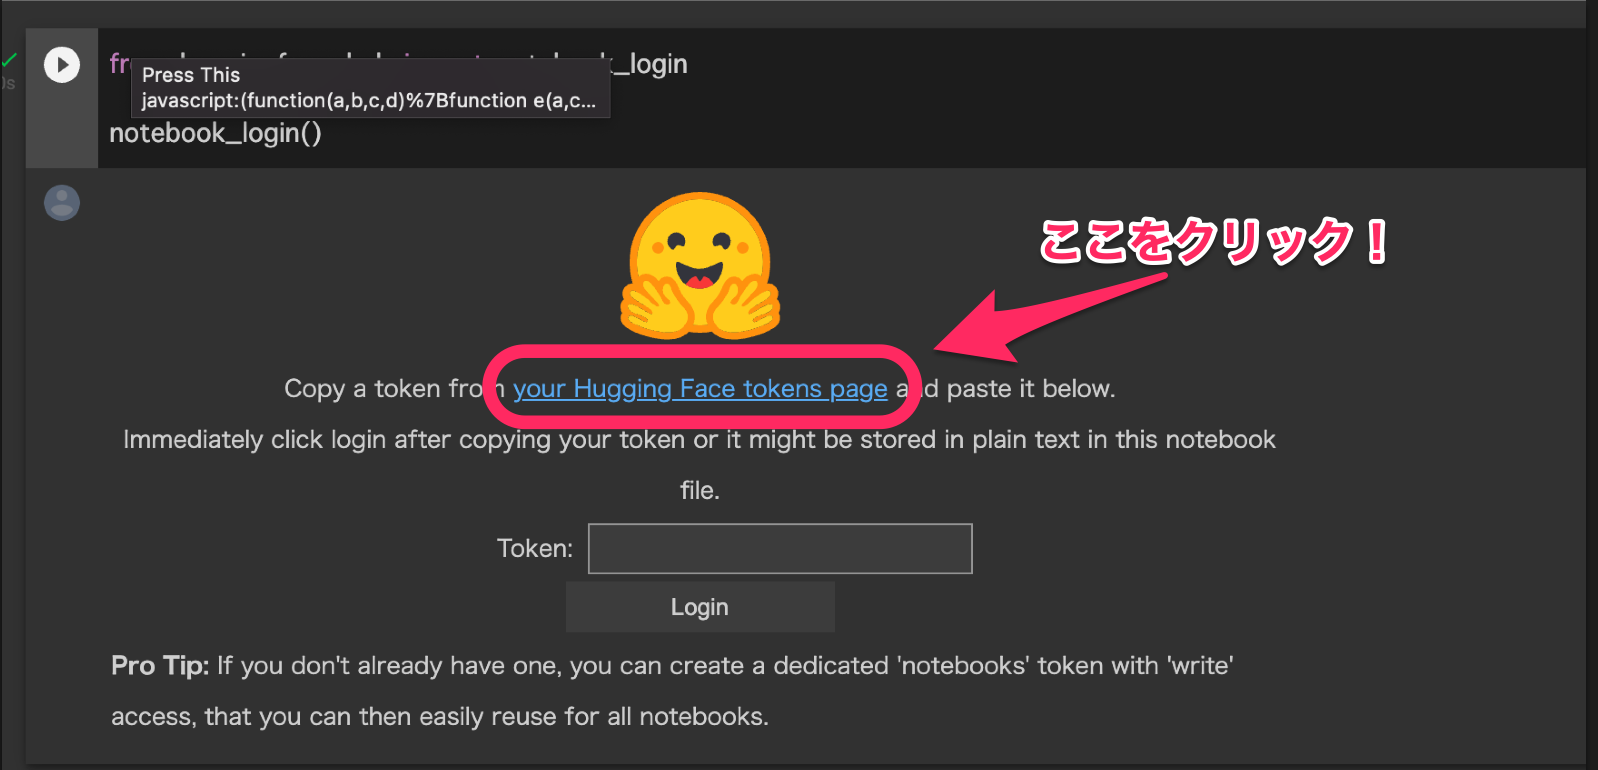
4.huggingfaceハギングフェースというところへ、tokenトークンをもらいにいく
青いURLをクリック!
5.HuggingFaceのサイトに飛ぶので、そこでアカウントを設定。
ここで、はじめてキーボードに触ります。

6.HuggingFace内の Stable-diffusion のページへ
https://huggingface.co/CompVis/stable-diffusion-v1-4
一番下の、チェックマークを押す!
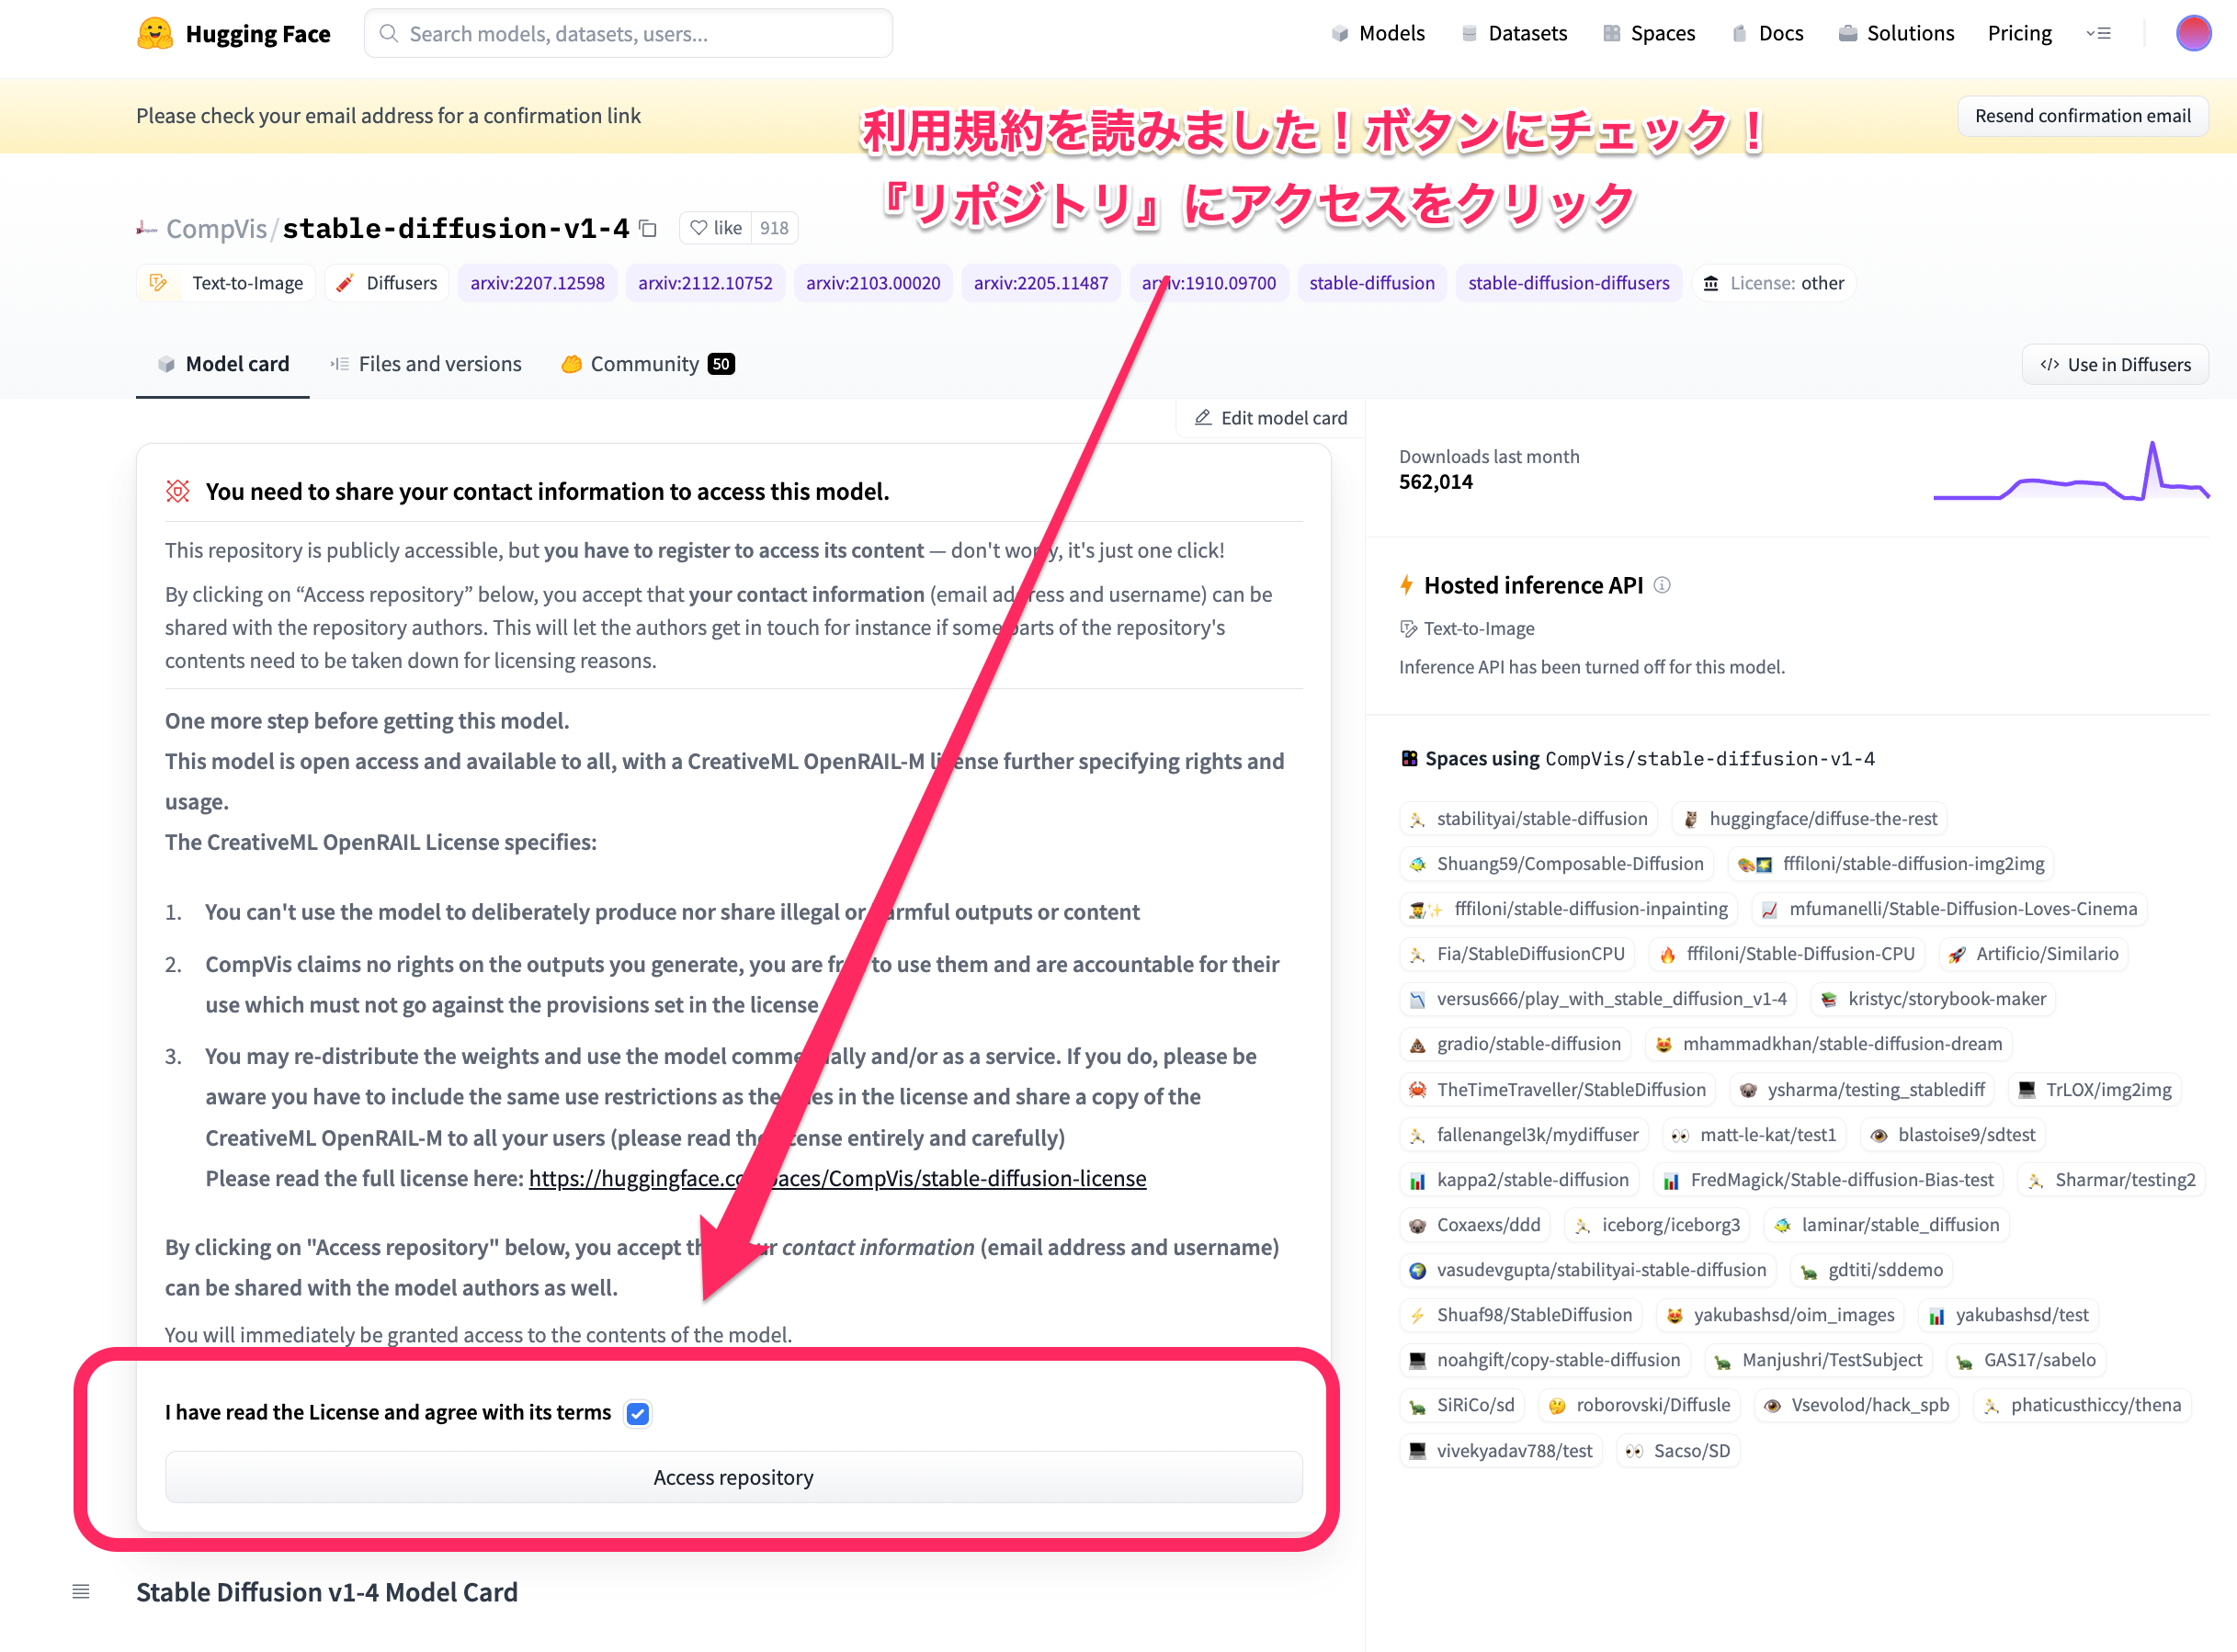
※『リポジトリ』とは、ファイルの保管場所のことです。
7.最初に登場した黒い画面へ戻る…
戻れなければ、この下をクリック!
https://colab.research.google.com/github/huggingface/notebooks/blob/main/diffusers/stable_diffusion.ipynb#scrollTo=8TRAh8G6sNfA
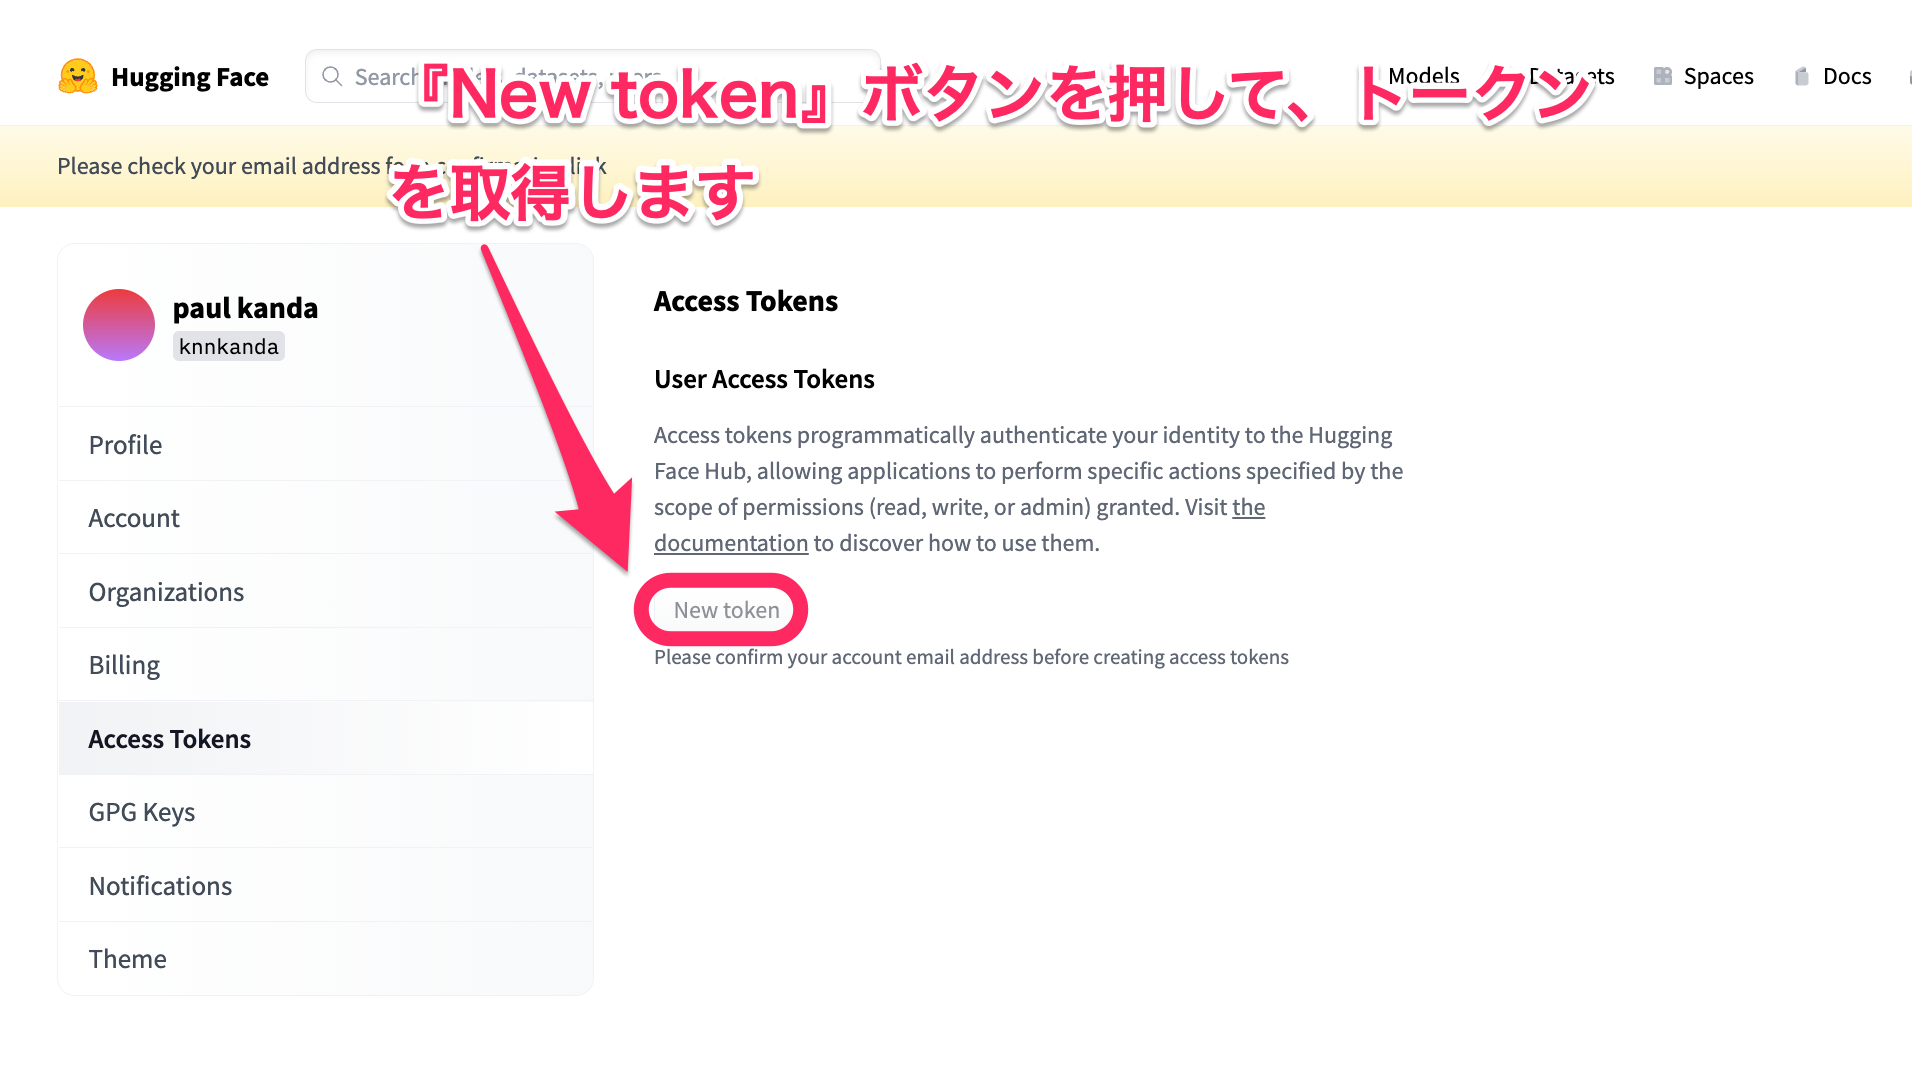
8.このリンクを再度クリックするとトークンの取得ページへ
9.『New token』ボタンをクリック
 10. アクセストークンに名前をつけて、Write 書き込みできるようにしてトークンを作ります!
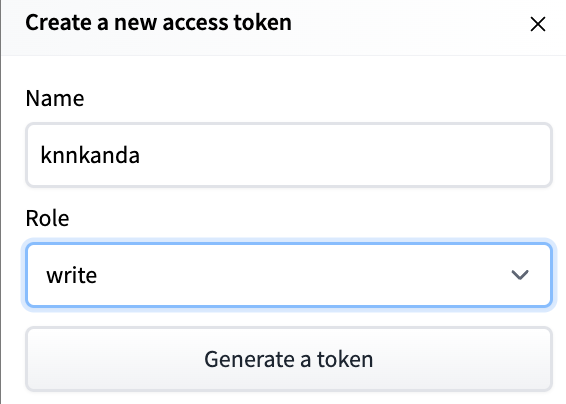
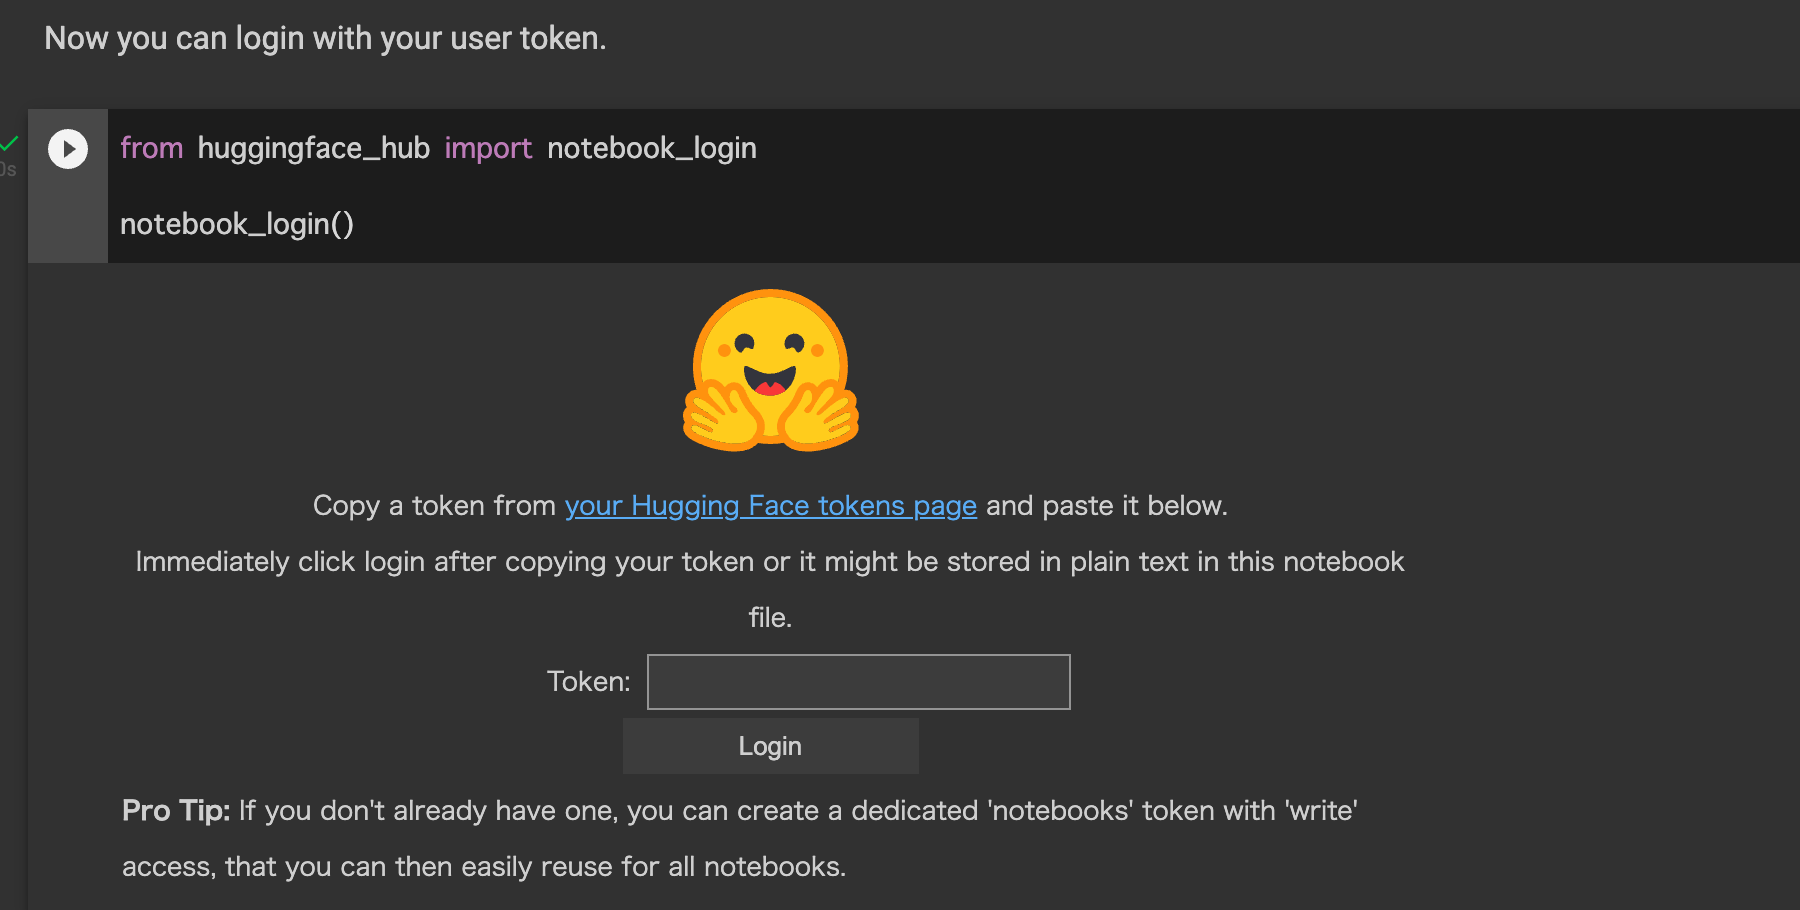
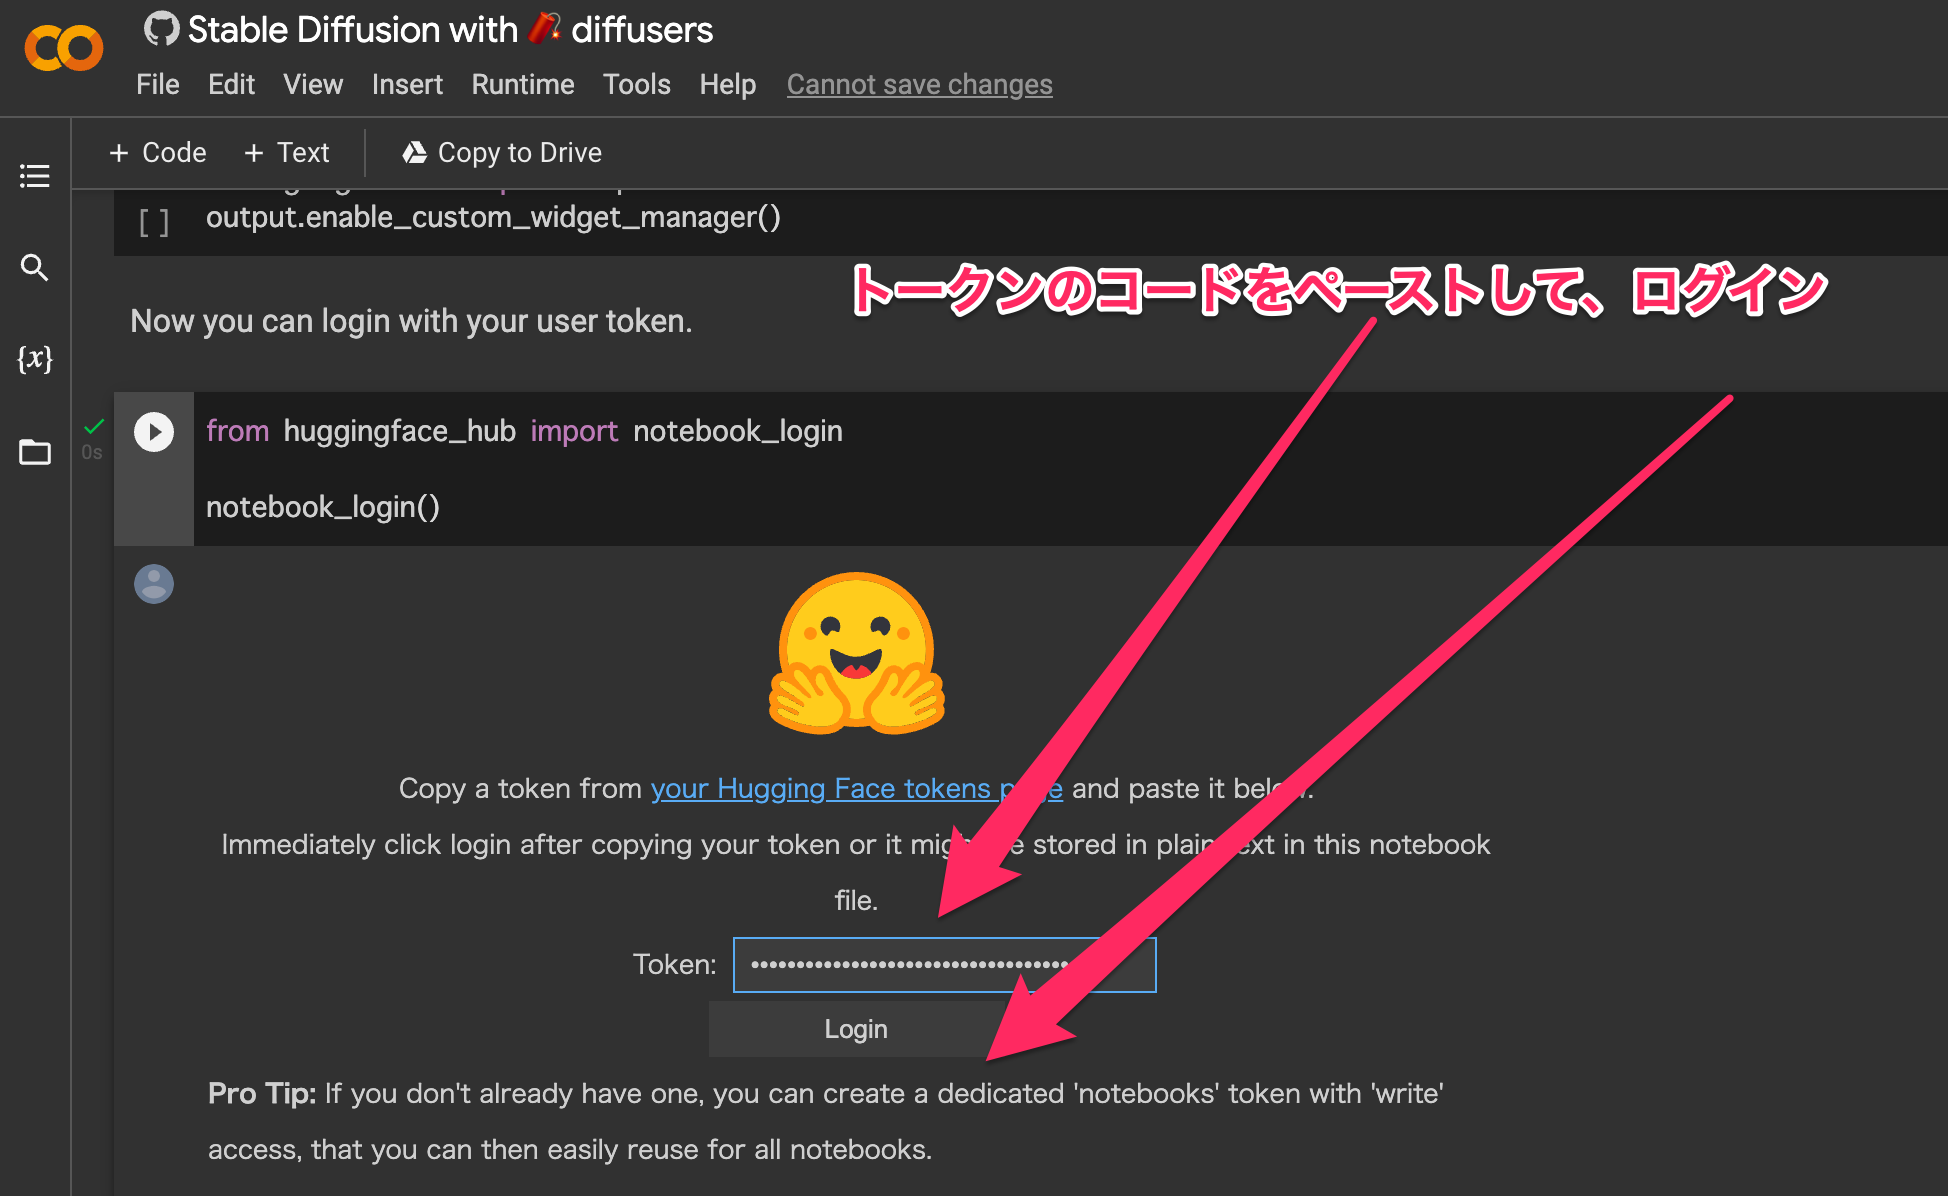
11.生成されたトークンのコードをコピーします。

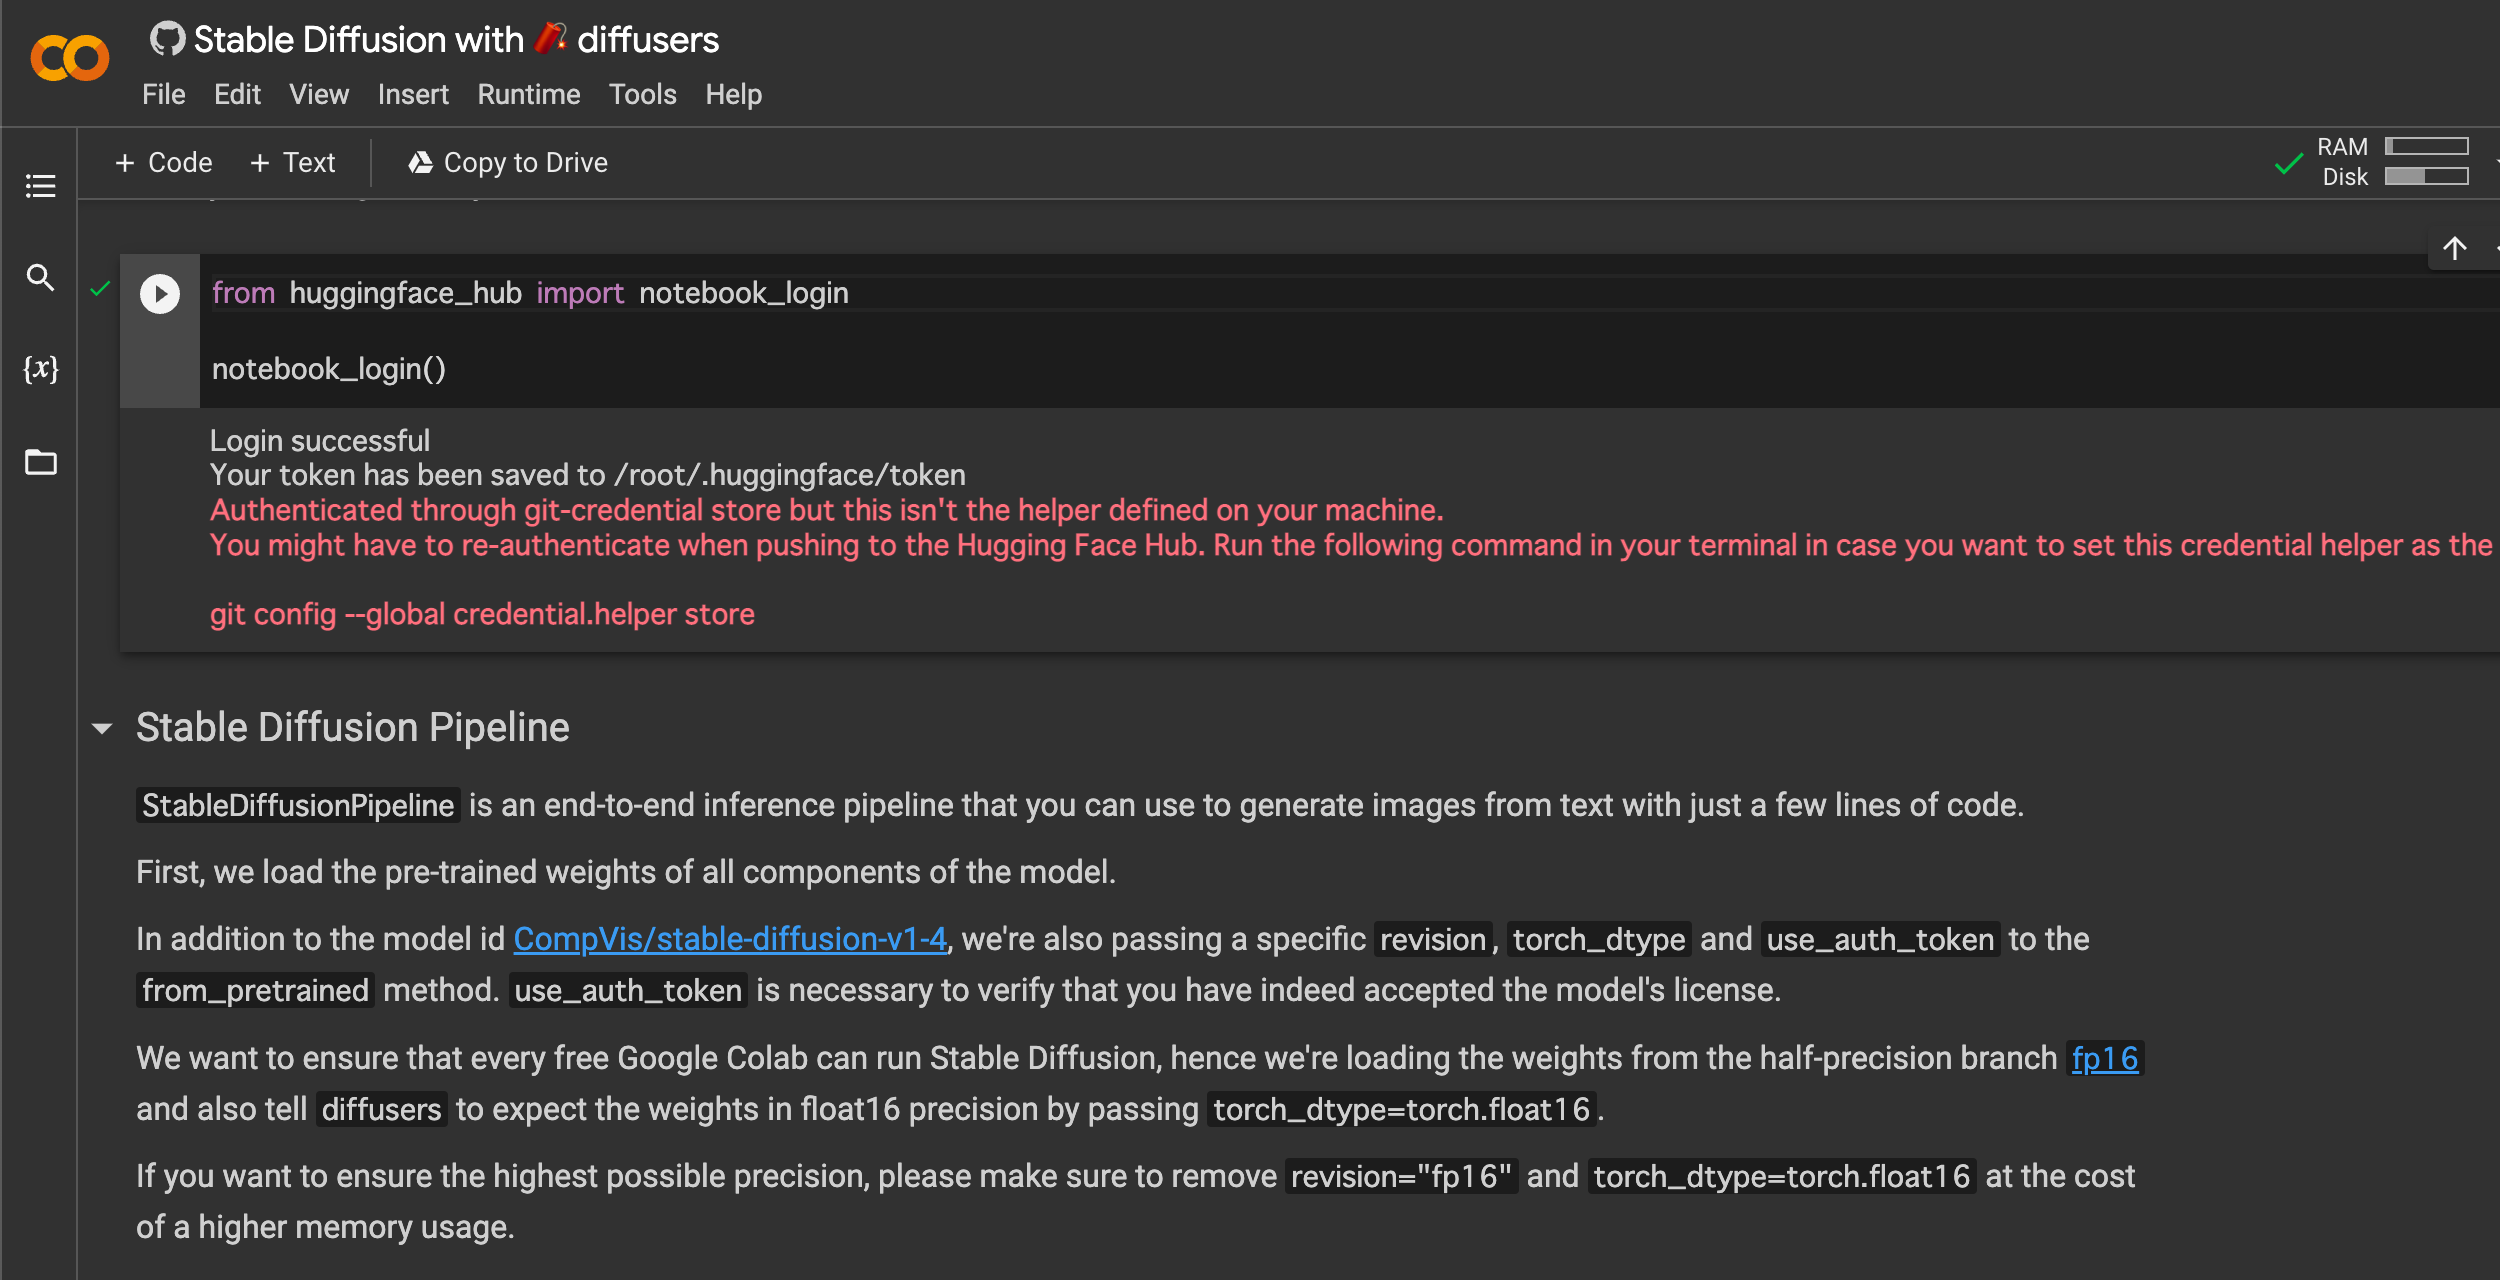
12.黒いページにもどり、トークンのコードをペーストします!そしてログイン!あともう少しだ!
13.ログイン成功すれば!あとは再生ボタンを押すだけ!
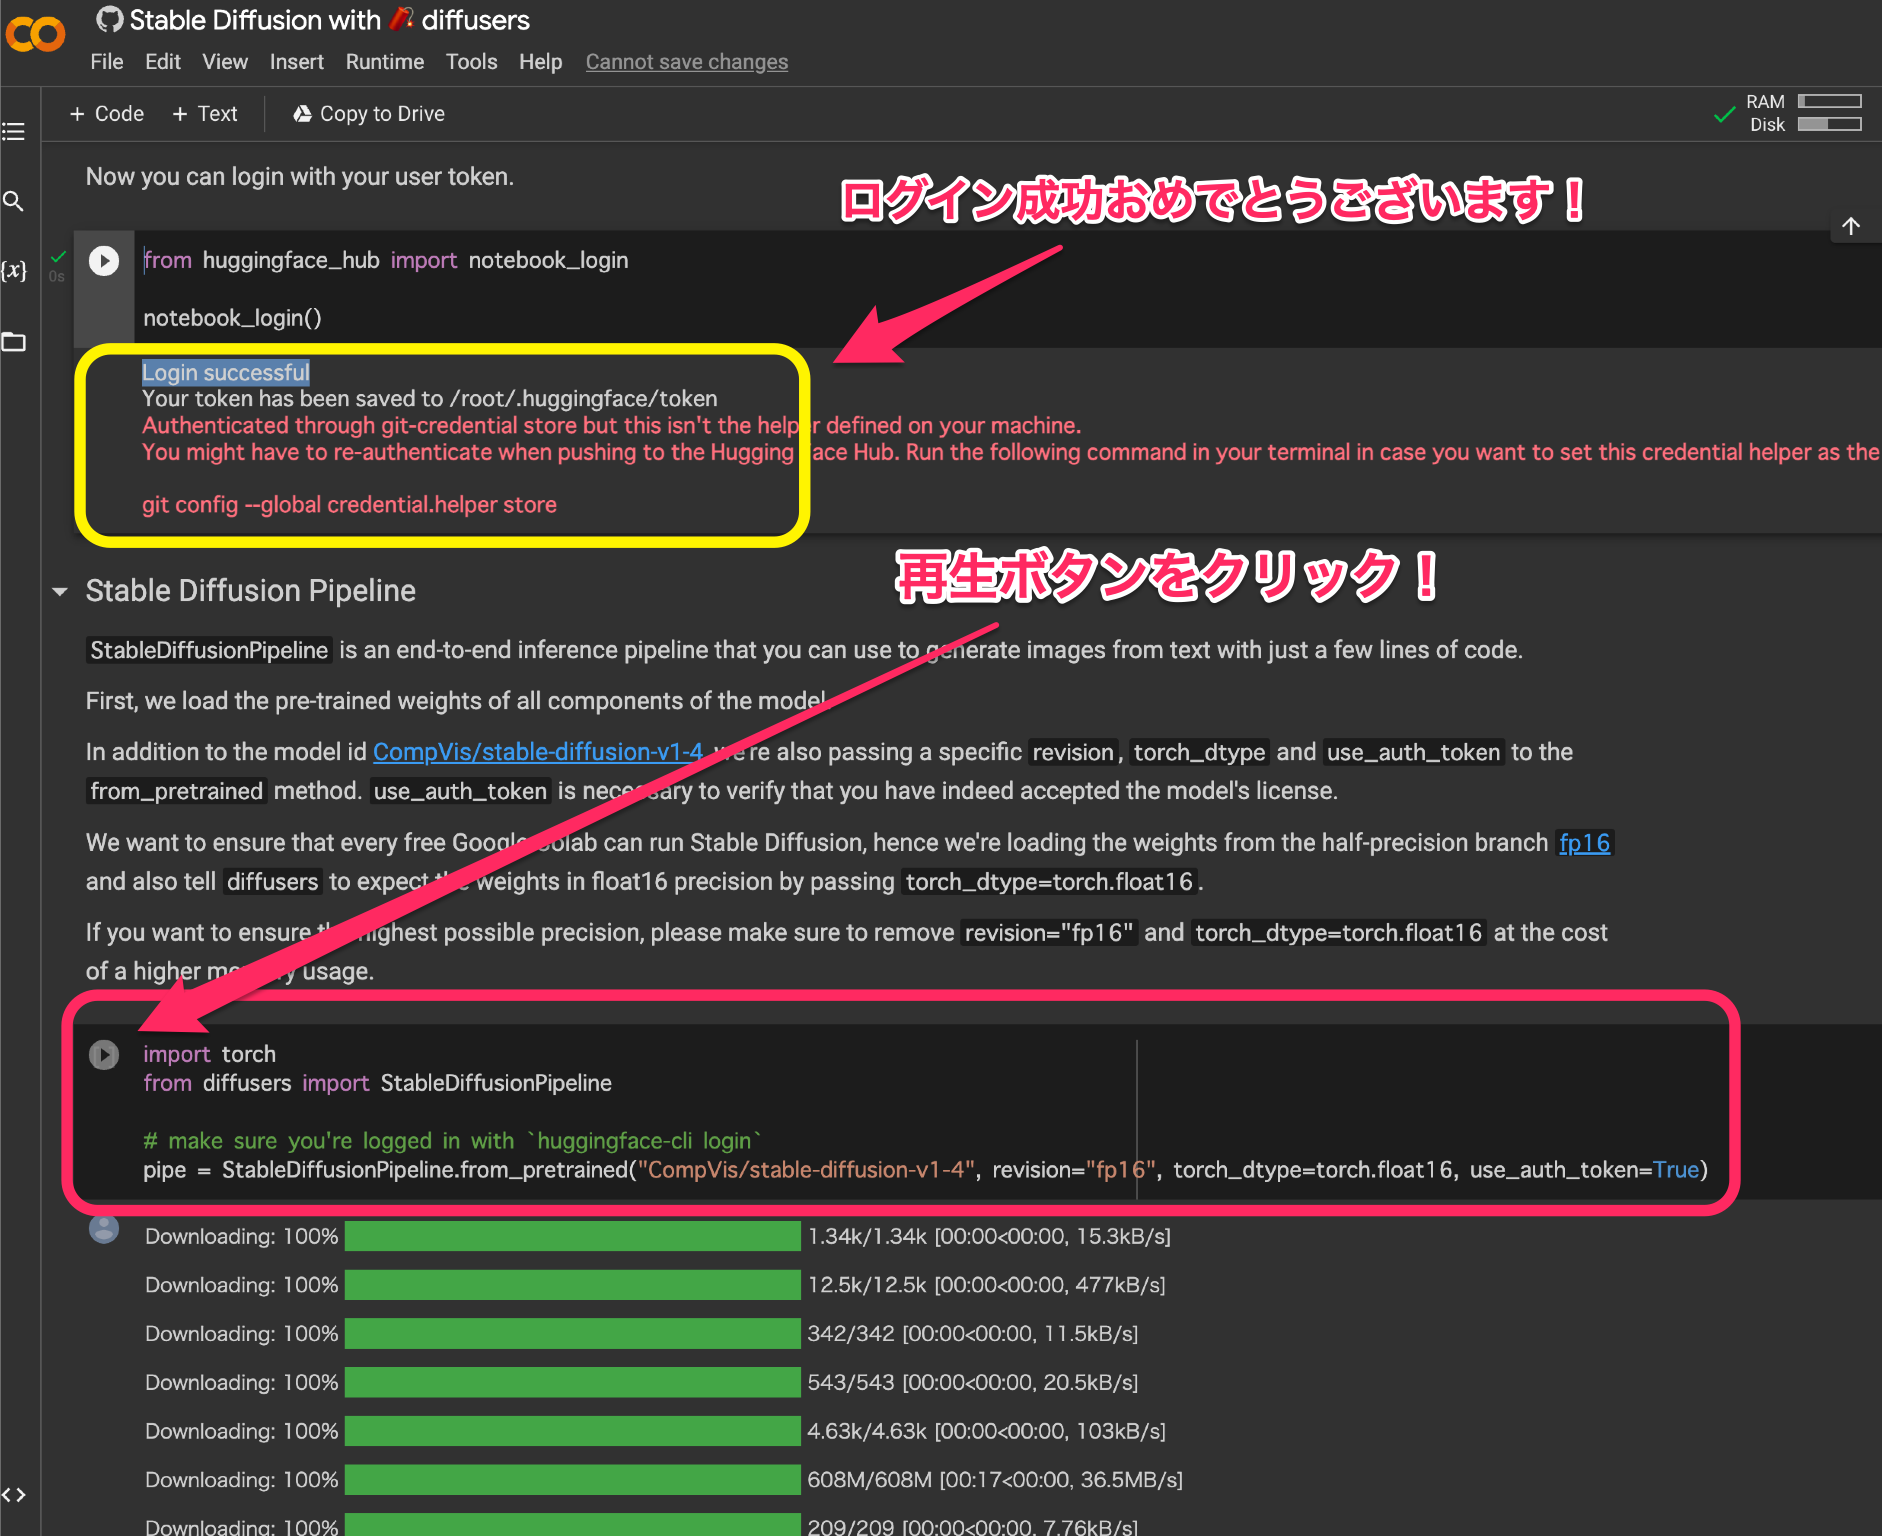
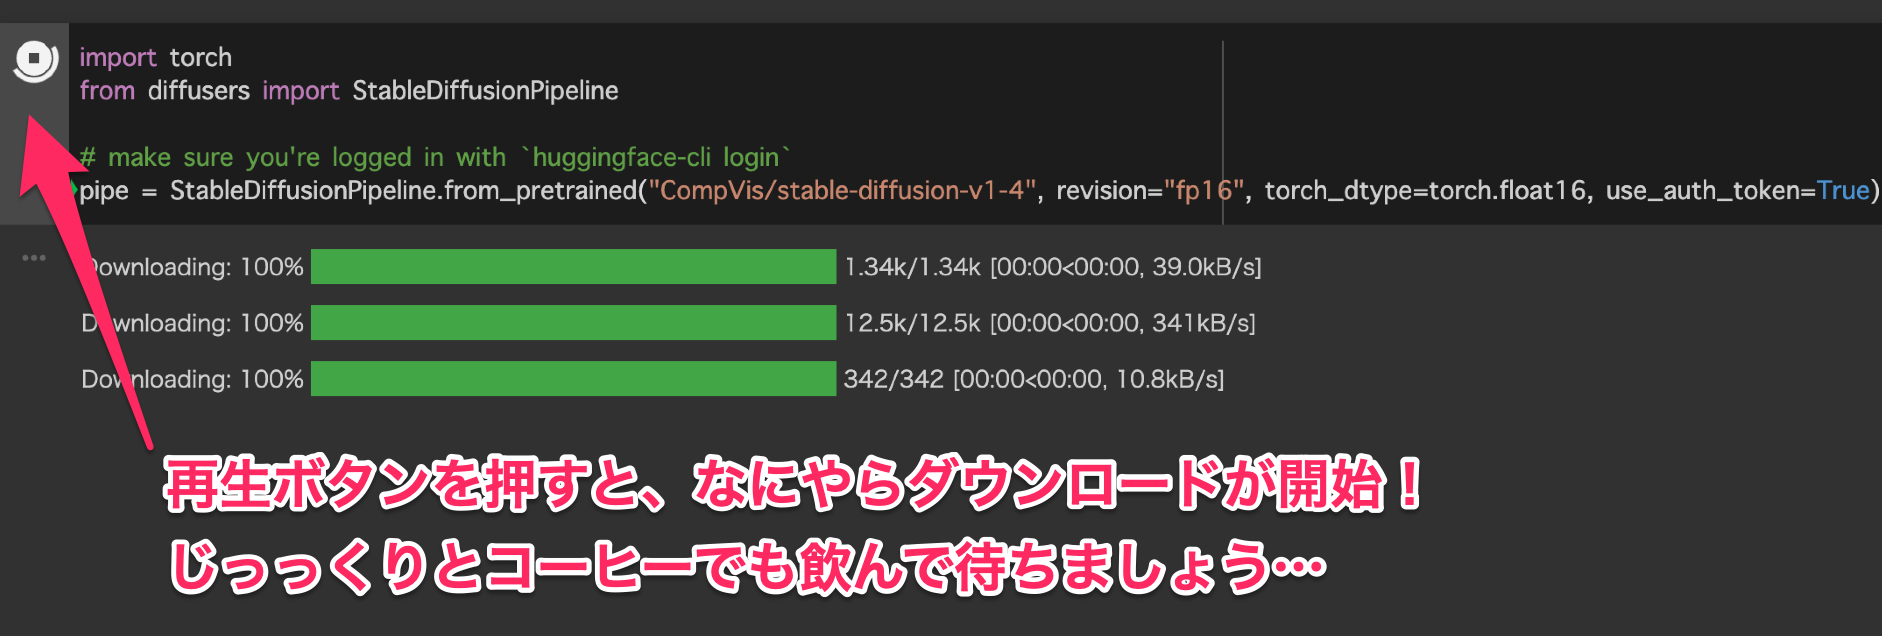
14.再生ボタンがまわり、ダウンロードがはじまります!
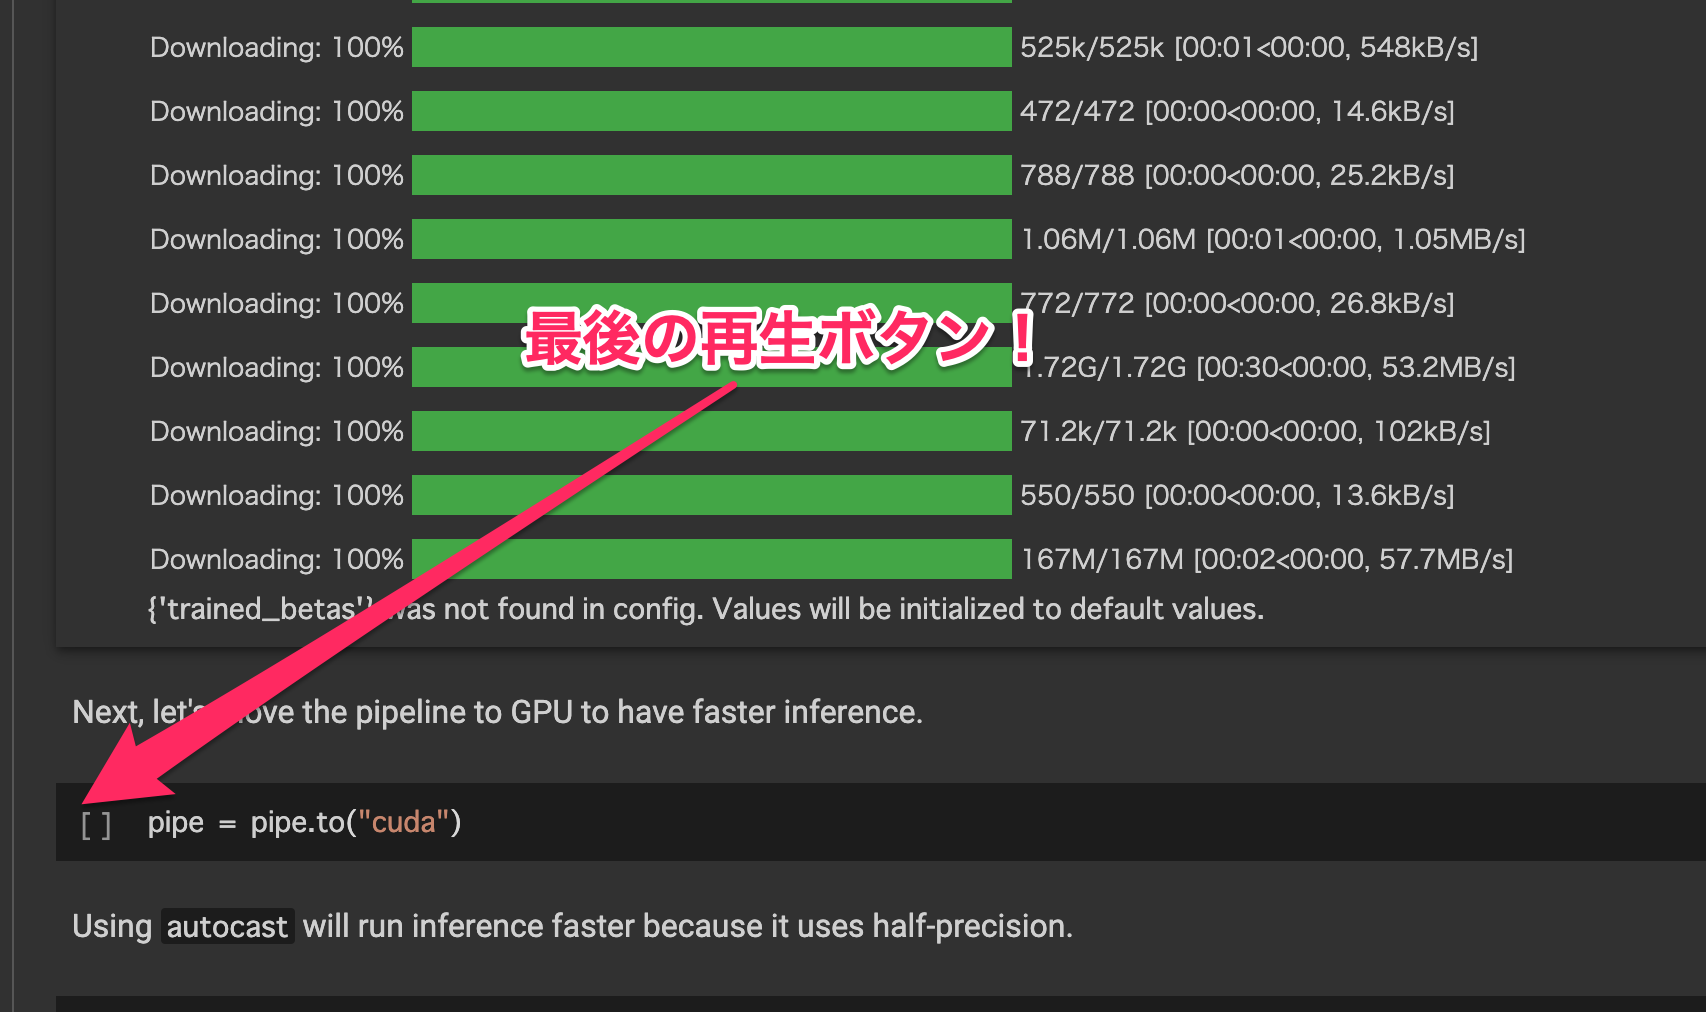
15. pipe = pipe.to (“cuda”) の再生ボタンを押す!
16.お疲れさまでした!
■さあ!さっそくAI にお絵かきさせてみよう!
“a photograph of an astronaut riding a horse” の部分を書き換えるだけ!
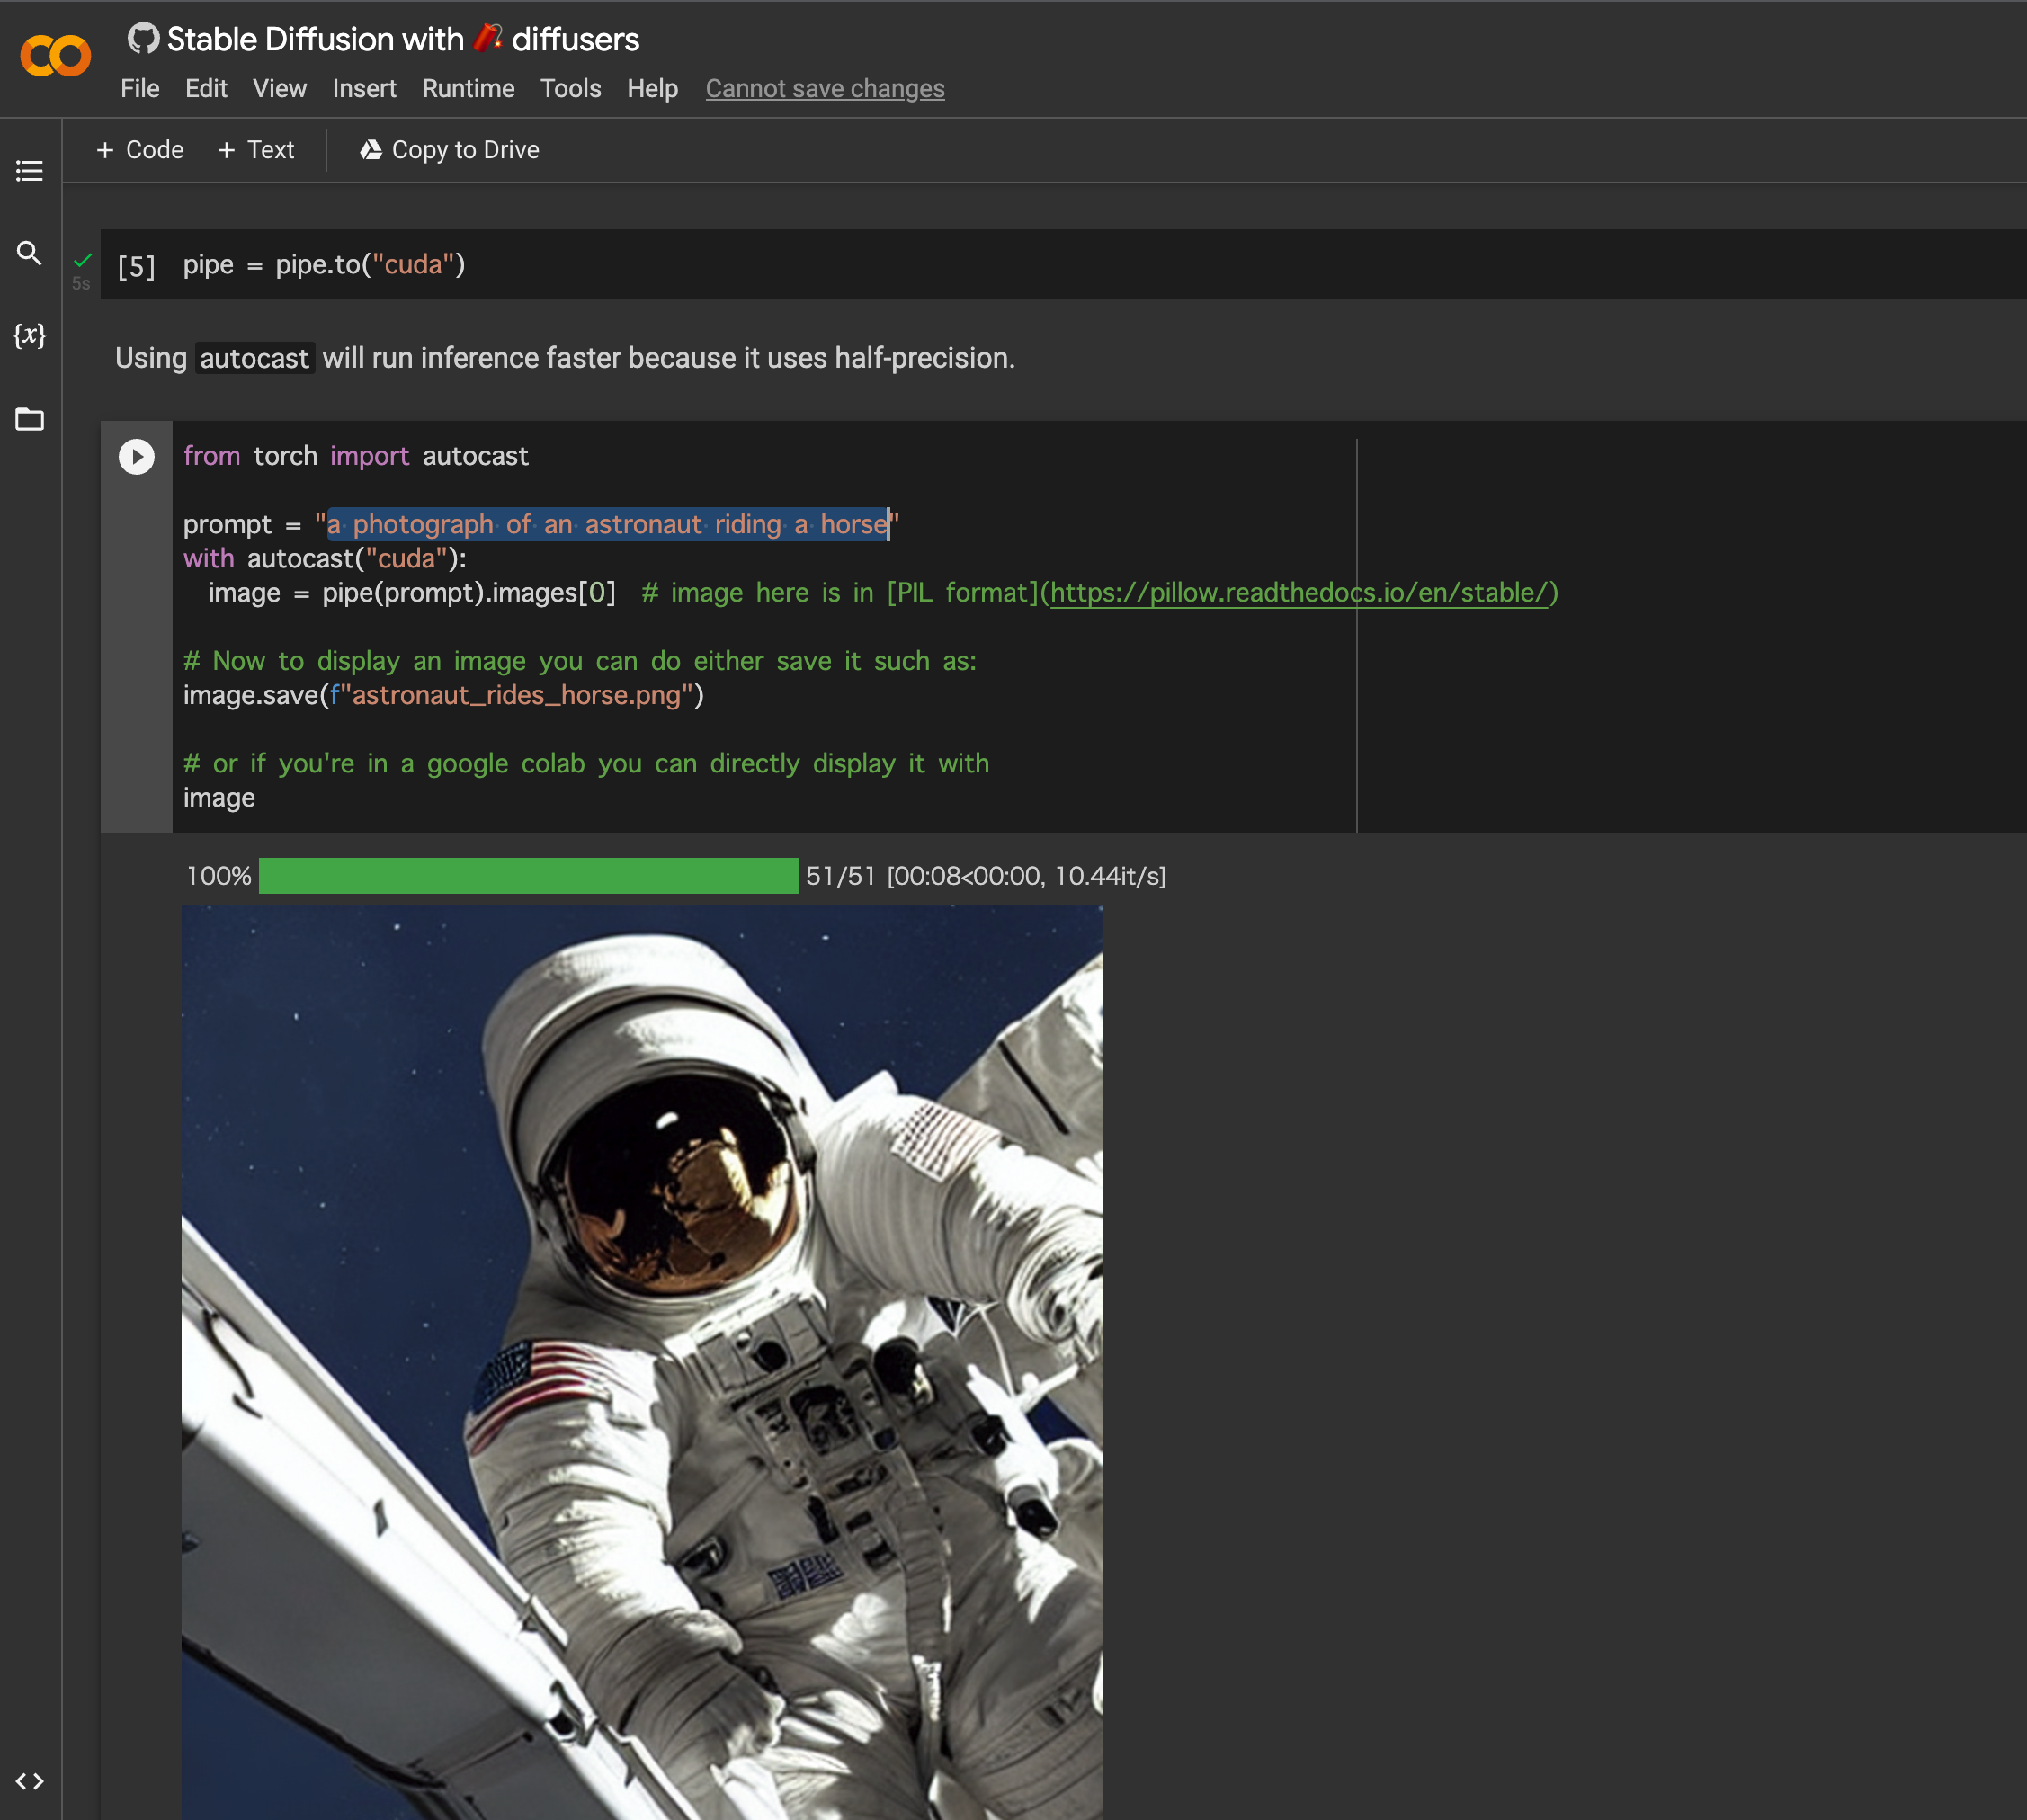
さぁ!おたのしみだ!
“a photograph of an astronaut riding a horse“の部分を書き換えて、
再生ボタンを押すだけ!
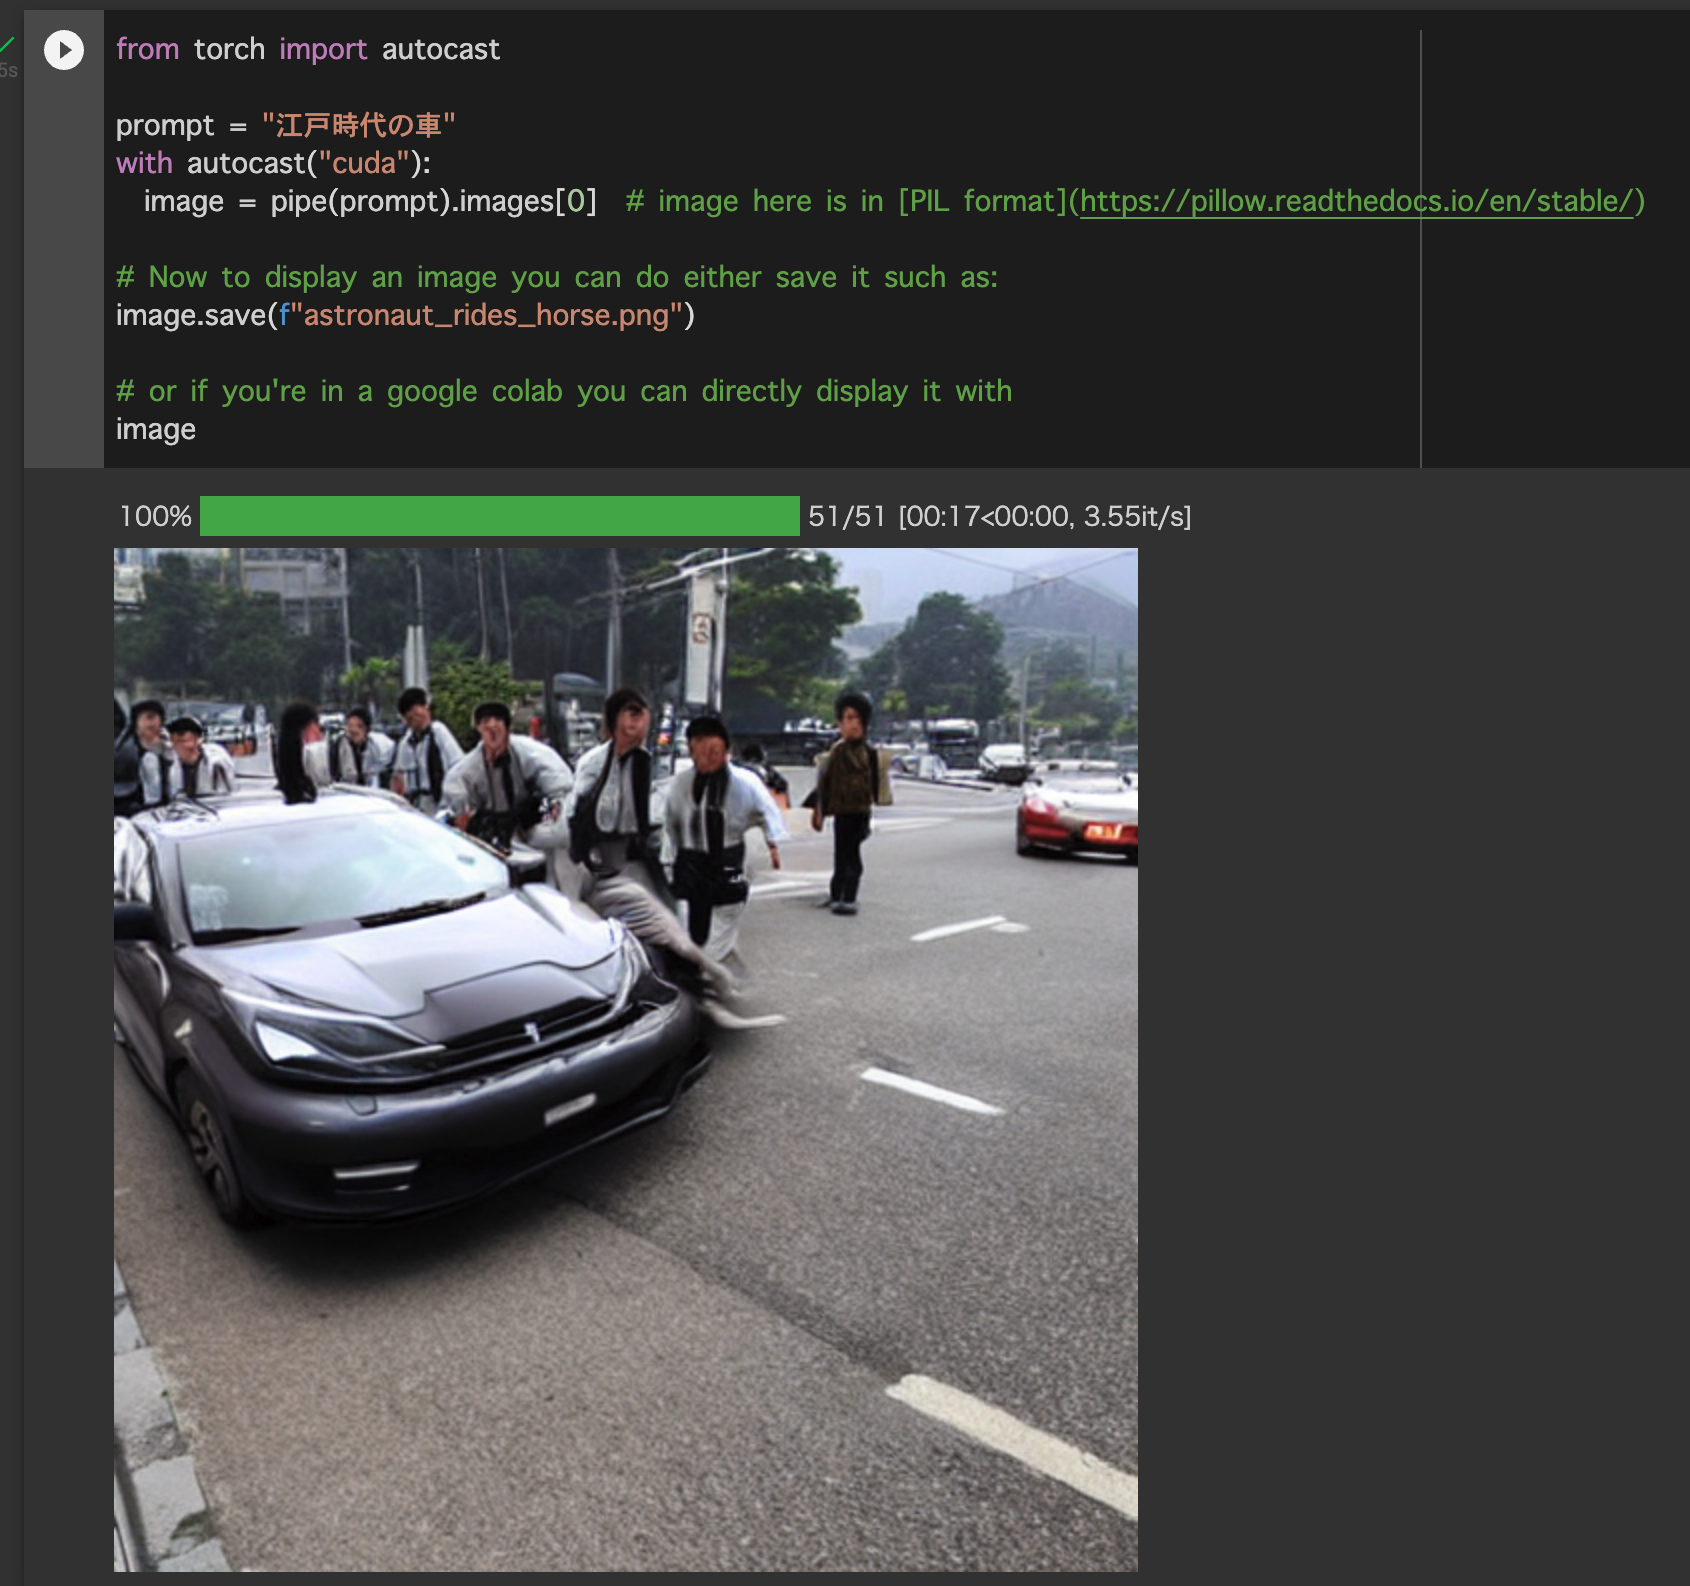
日本語でも大丈夫だけど、あんまり理解してくれてないぞ!
■”江戸時代の車”
えー!!!
■ピカソの描いた江戸城
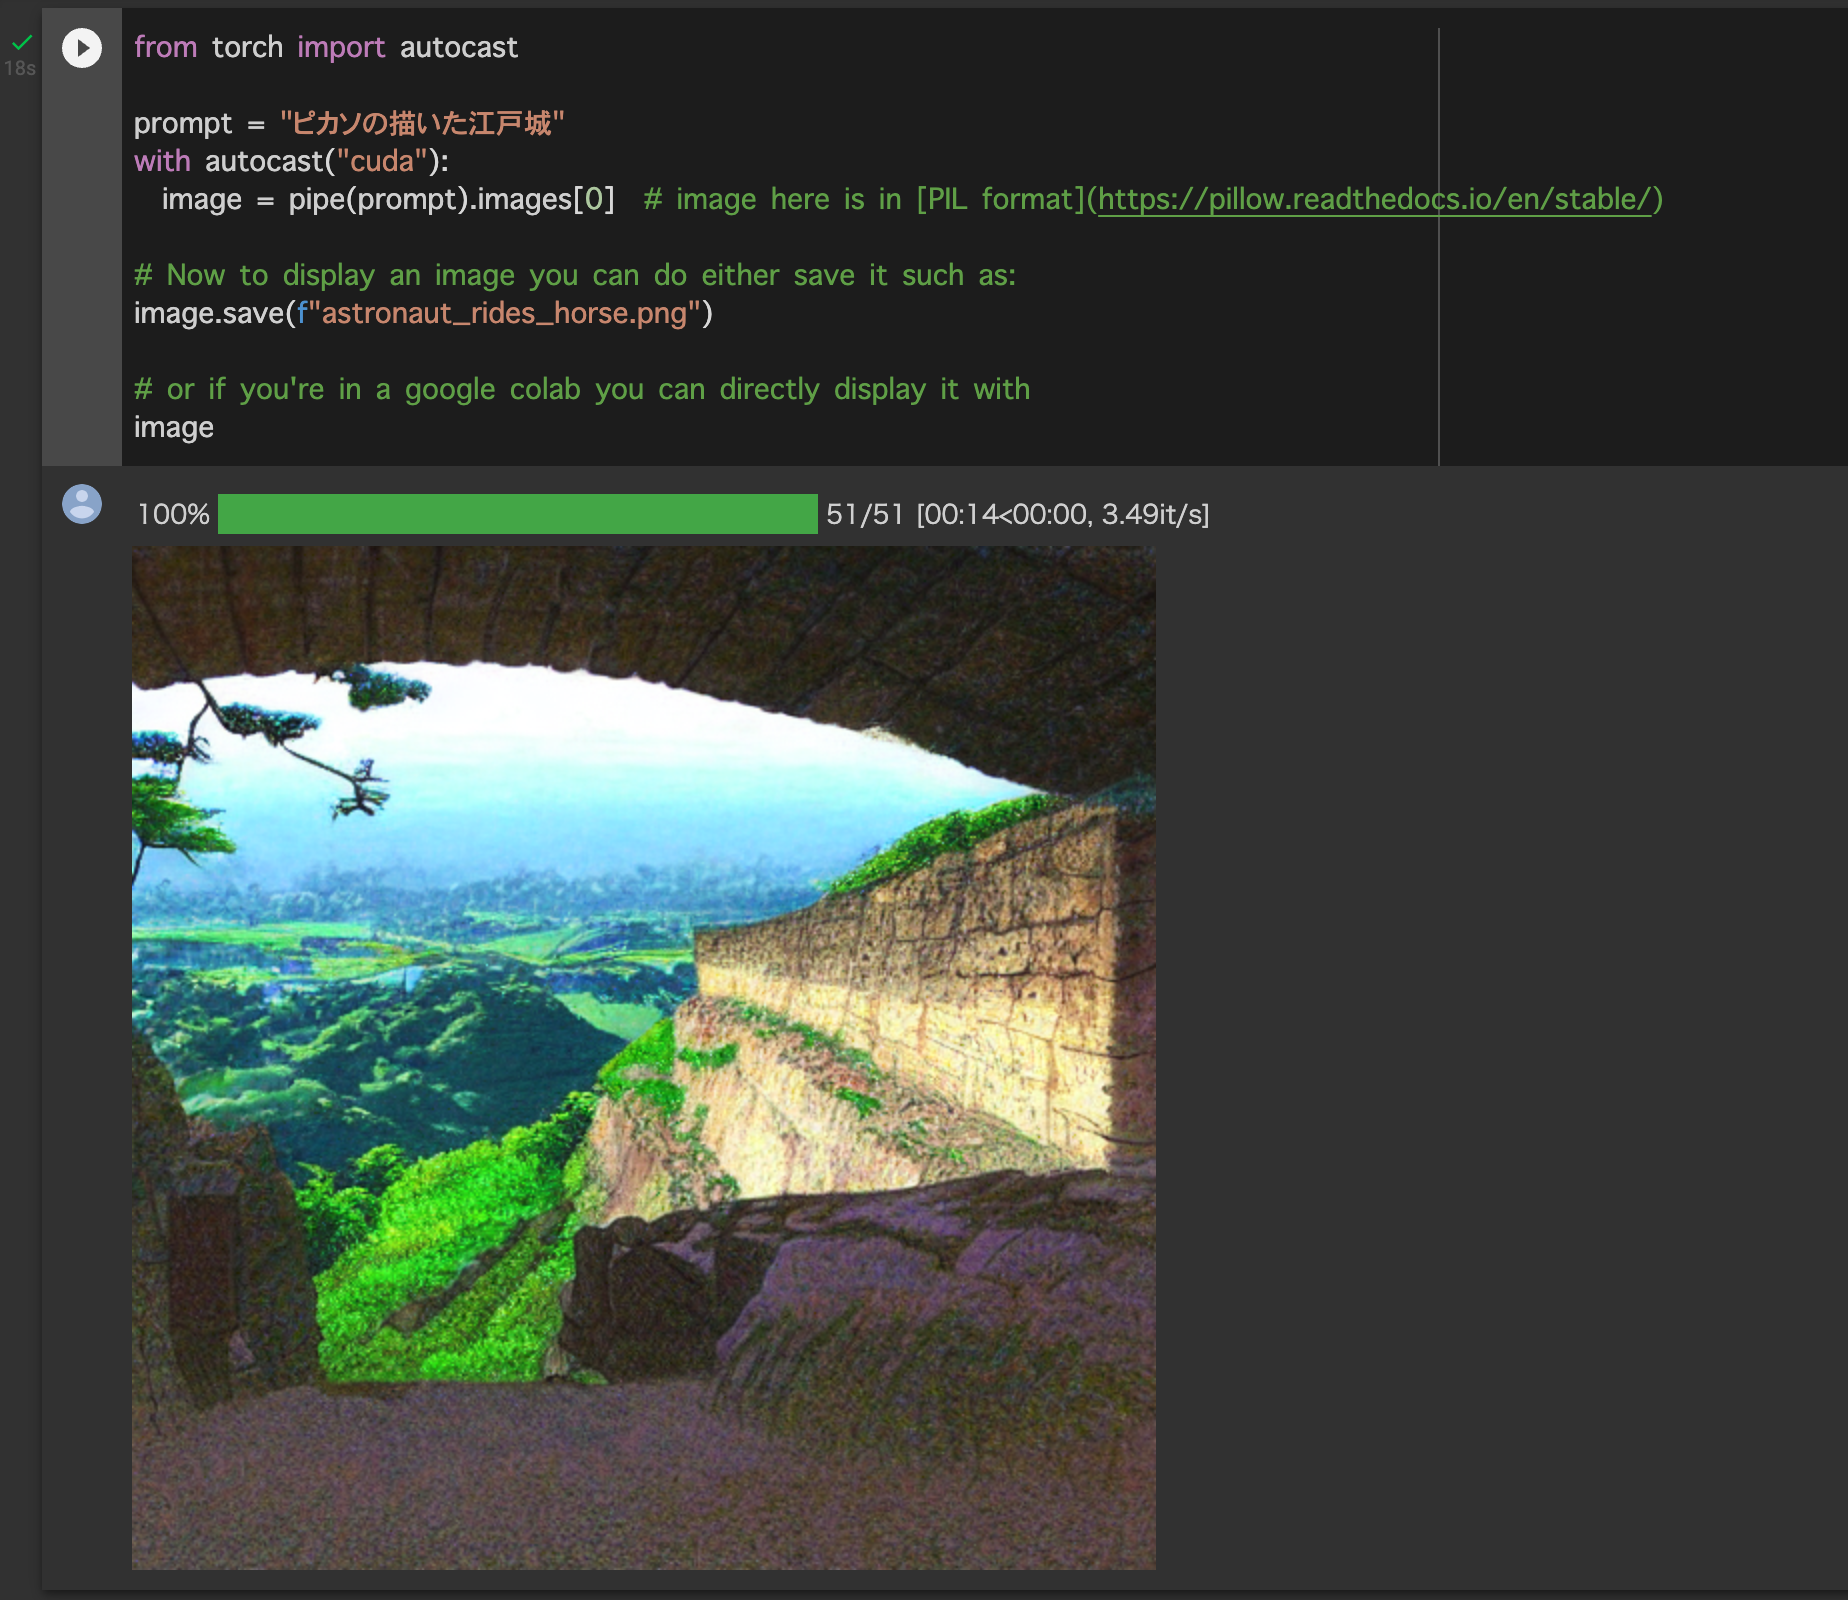
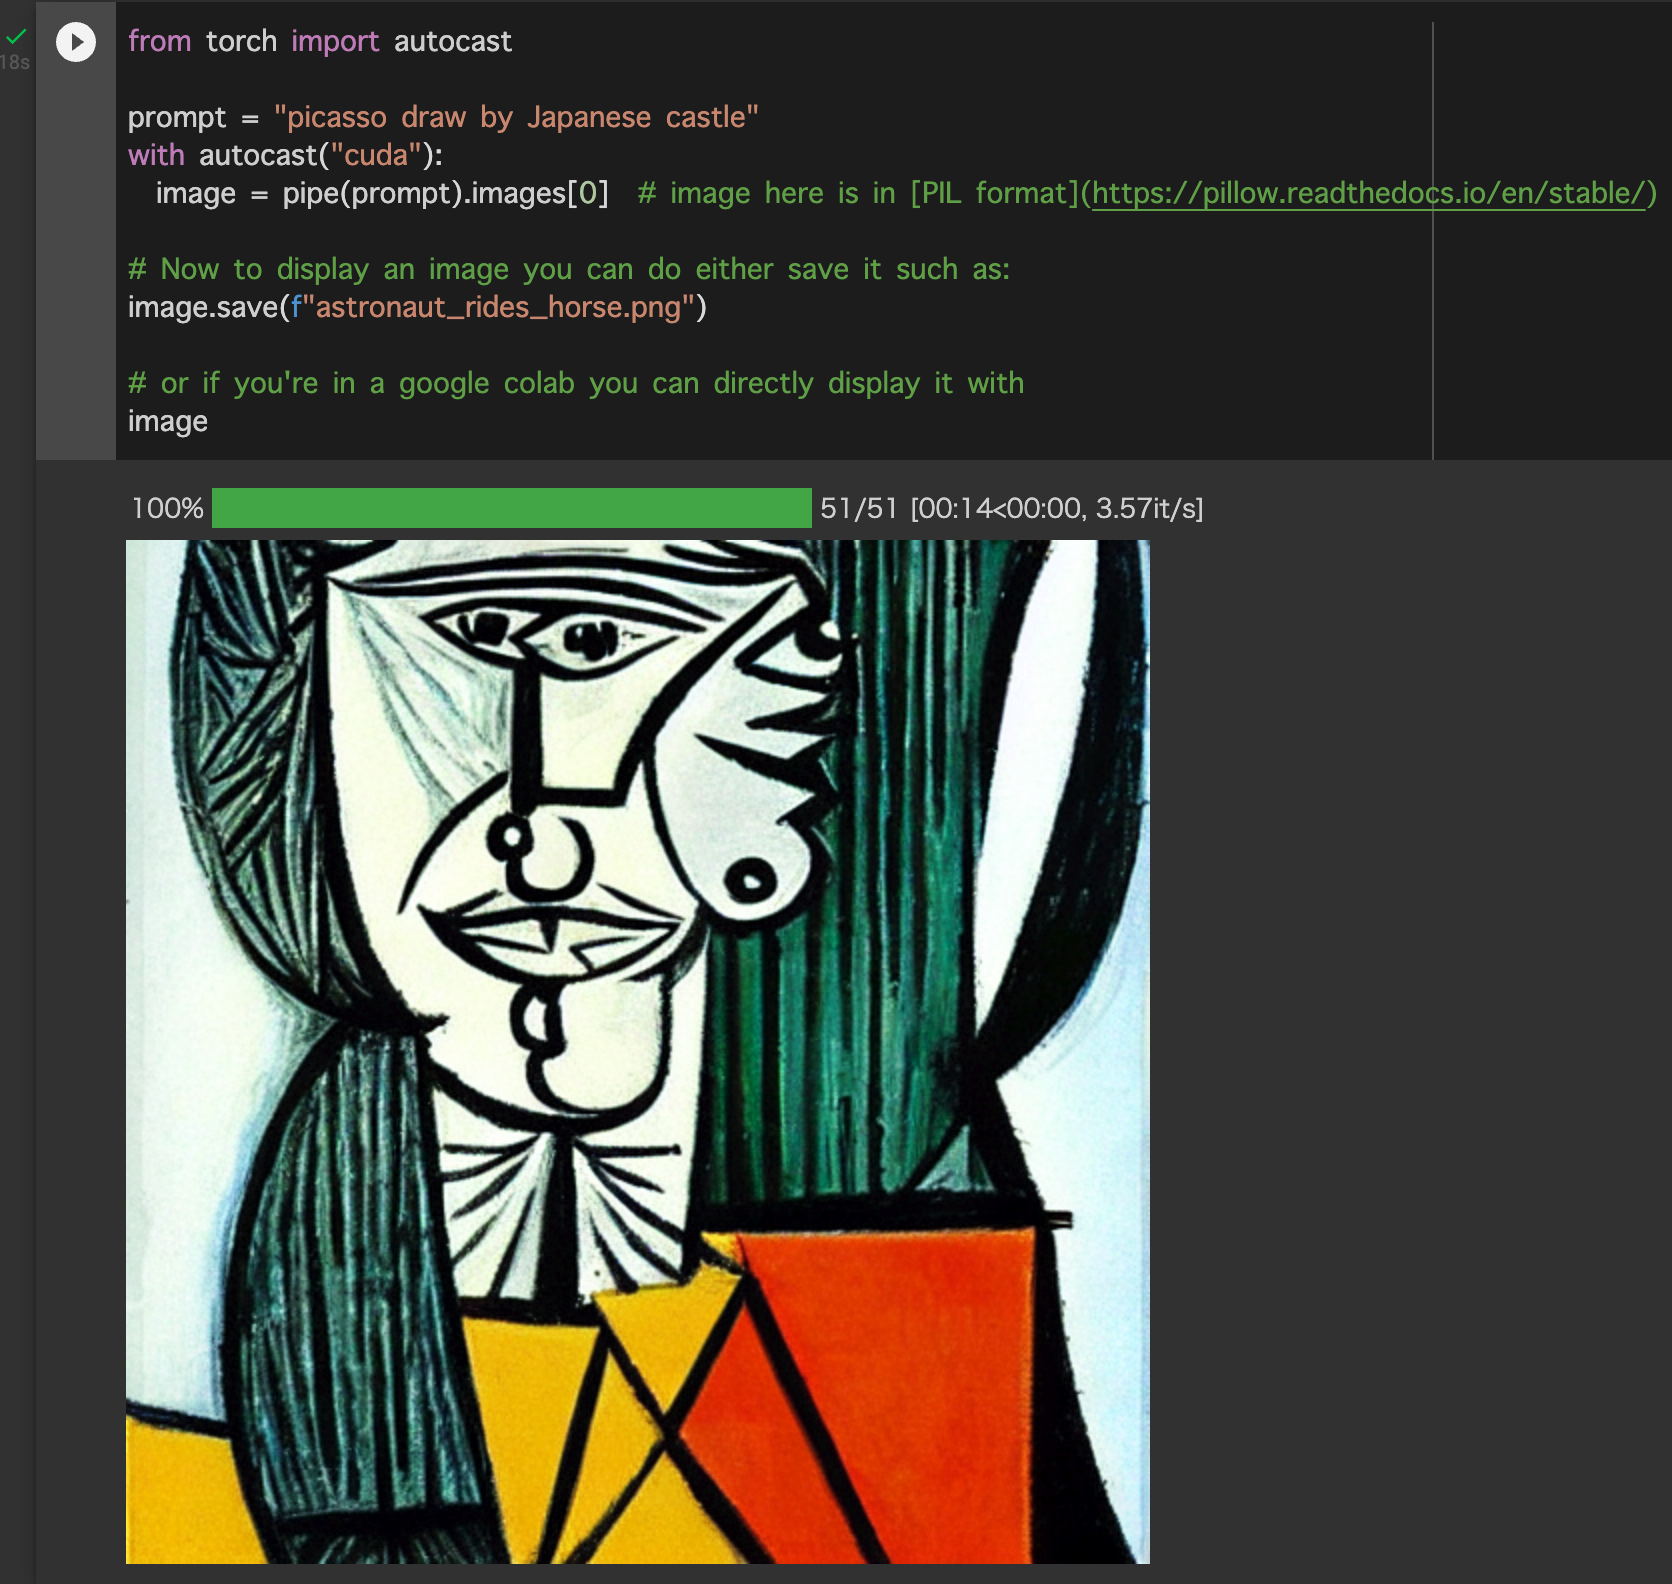
■やはり英語でAIに頼んだほうがよさそうだ…w
”picasso draw by japanese castle”
おおお!!
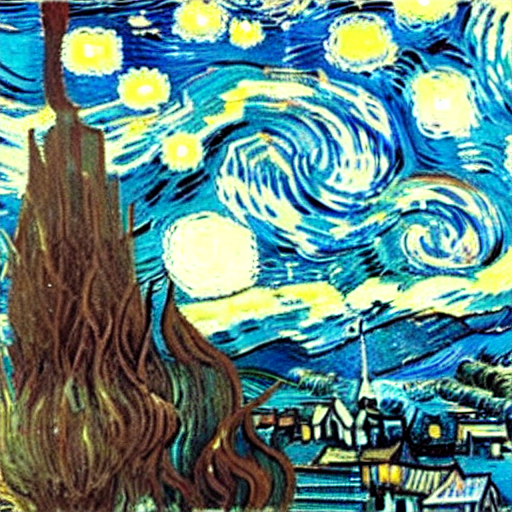
■『ゴッホの描いた宇宙ステーション』
をDeepLで翻訳して AI StableDiffusion に無茶振りして描かせる!
“a photograph of Van Gogh’s depiction of a space station”
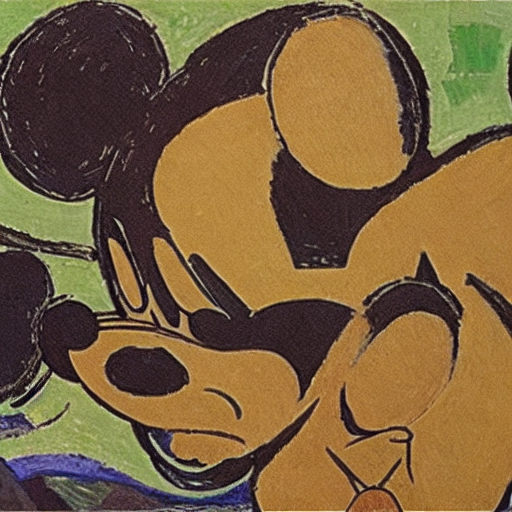
ゴッホの描くミッキーマウス
from torch import autocast
prompt = “a photograph of Van Gogh’s depiction of a mickey mouse”
with autocast(“cuda”):
image = pipe(prompt).images[0] # image here is in [PIL format](https://pillow.readthedocs.io/en/stable/)
# Now to display an image you can do either save it such as:
image.save(f”astronaut_rides_horse.png”)
# or if you’re in a google colab you can directly display it with
image
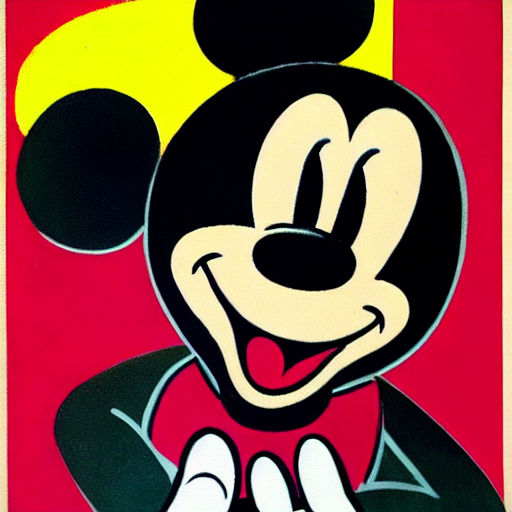
■ピカソの描いたミッキーマウス
from torch import autocast
prompt = “a photograph of Mickey Mouse painted by Picasso”
with autocast(“cuda”):
image = pipe(prompt).images[0] # image here is in [PIL format](https://pillow.readthedocs.io/en/stable/)
# Now to display an image you can do either save it such as:
image.save(f”astronaut_rides_horse.png”)
# or if you’re in a google colab you can directly display it with
image
■一気に3枚描かせてみた!
num_images = 3
prompt = [“a photograph of Van Gogh’s depiction of a space station”] * num_images
with autocast(“cuda”):
images = pipe(prompt).images
grid = image_grid(images, rows=1, cols=3)
grid
Google Colaboratory グーグル コラボラトリー
Views: 1